

Sales Receipt
A sales receipt is a document that confirms a payment has been received for goods or services.
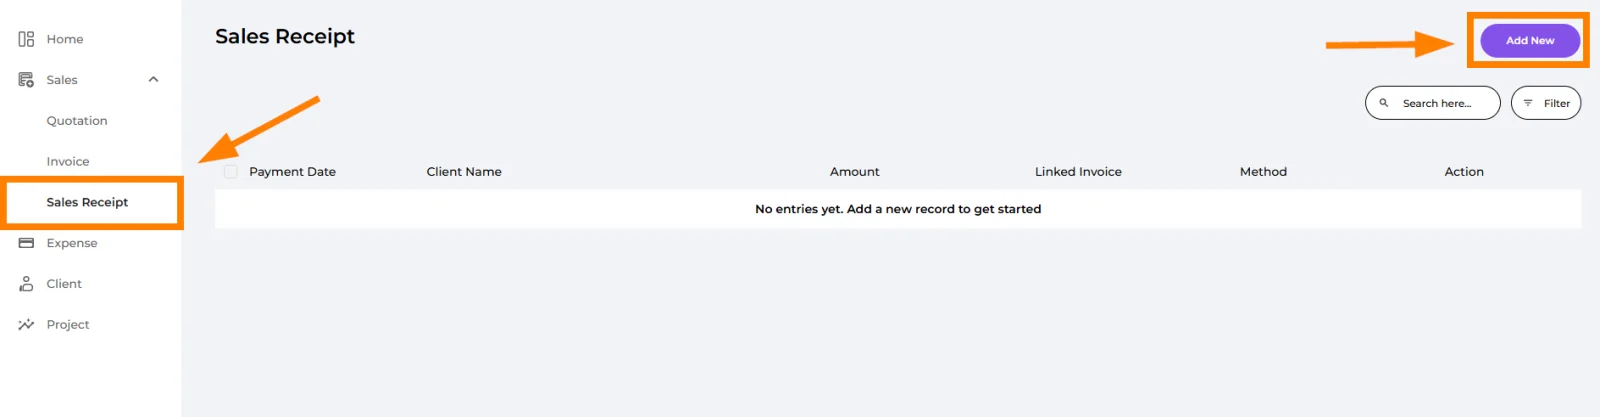
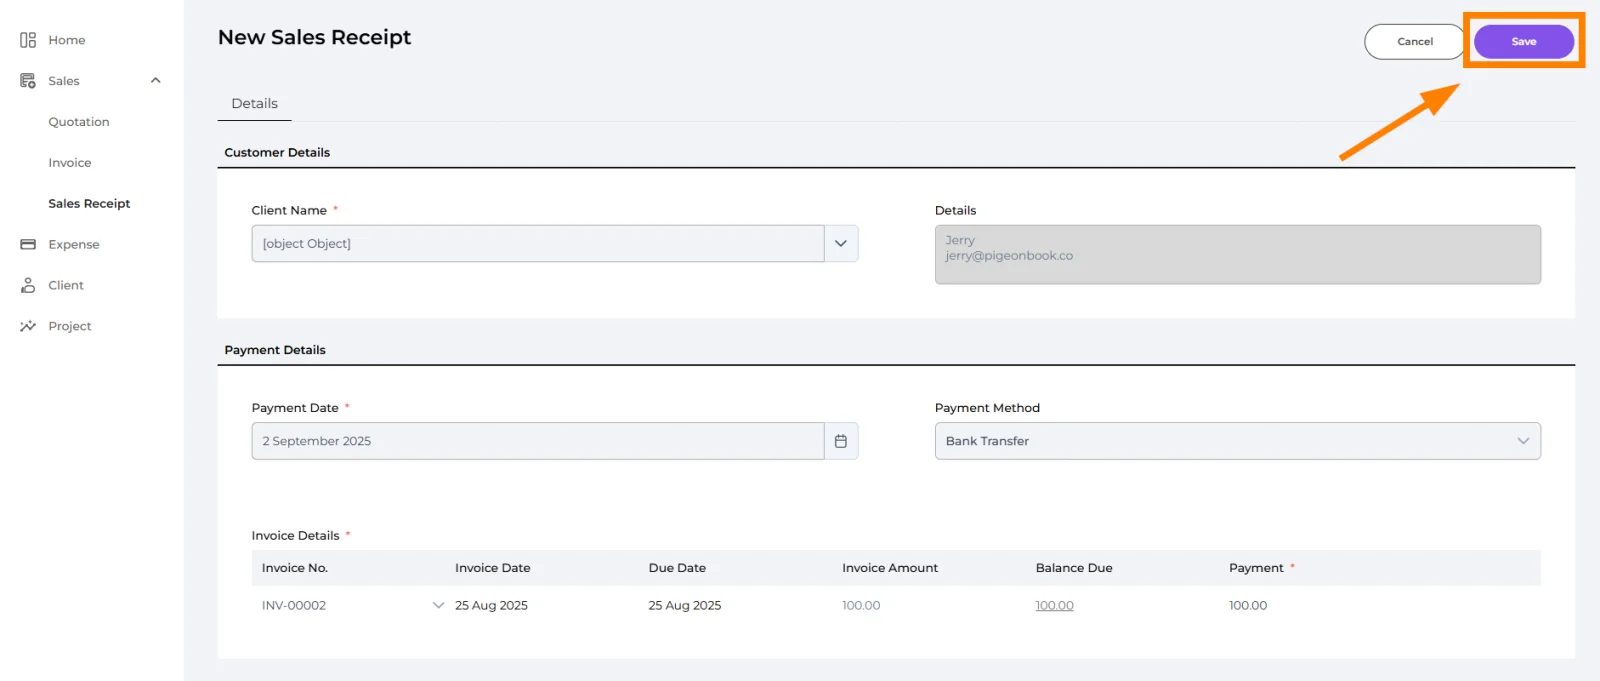
Navigate to the Sales dropdown, select Sales Receipt, and click "Add New" to create a new sales receipt.
Note: You can skip this step if you are generating the receipt directly from an invoice.
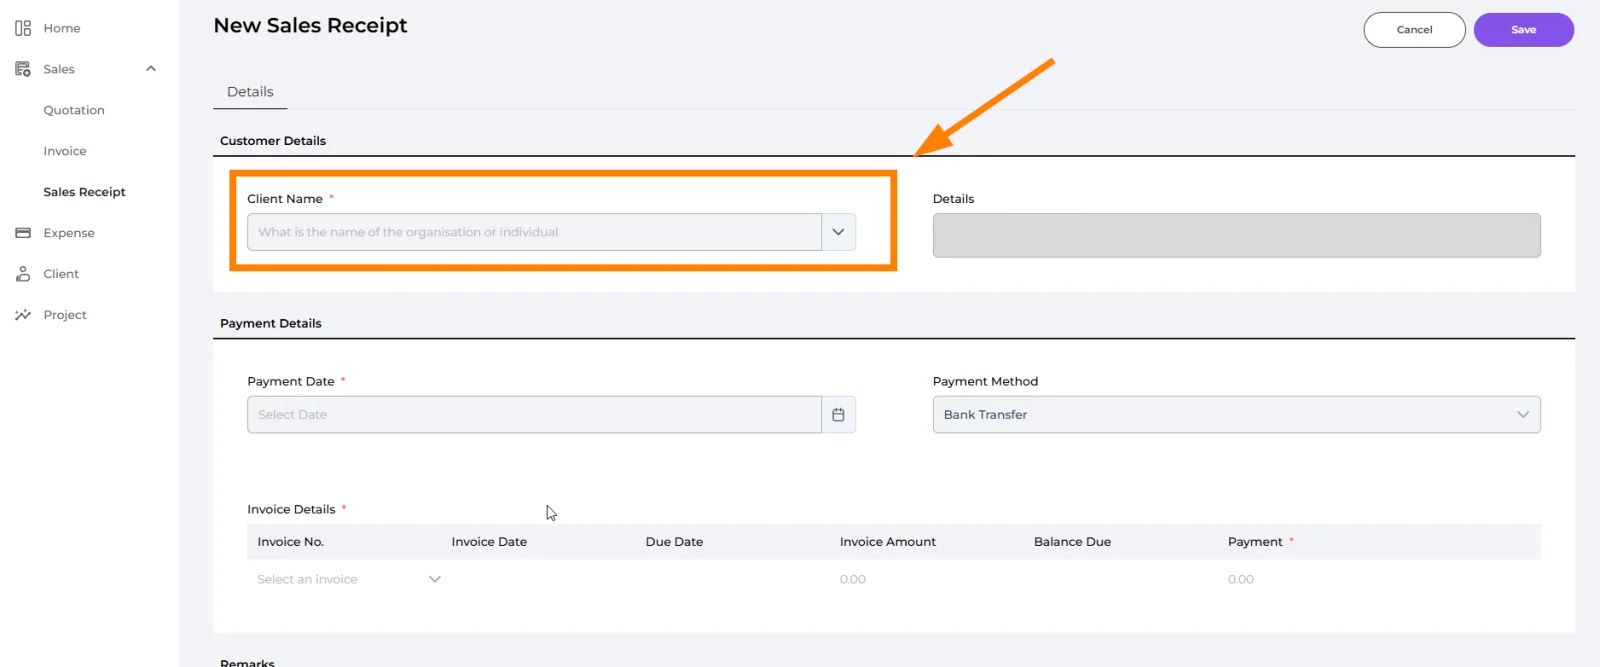
🔹 Client Name (Required)
Select or type your customer’s registered name. This links the invoice to the correct client profile.
🔹 Details
Auto-filled with the contact person and contact number once the client is selected.
Note: You can skip this step if you are generating the receipt directly from an invoice.
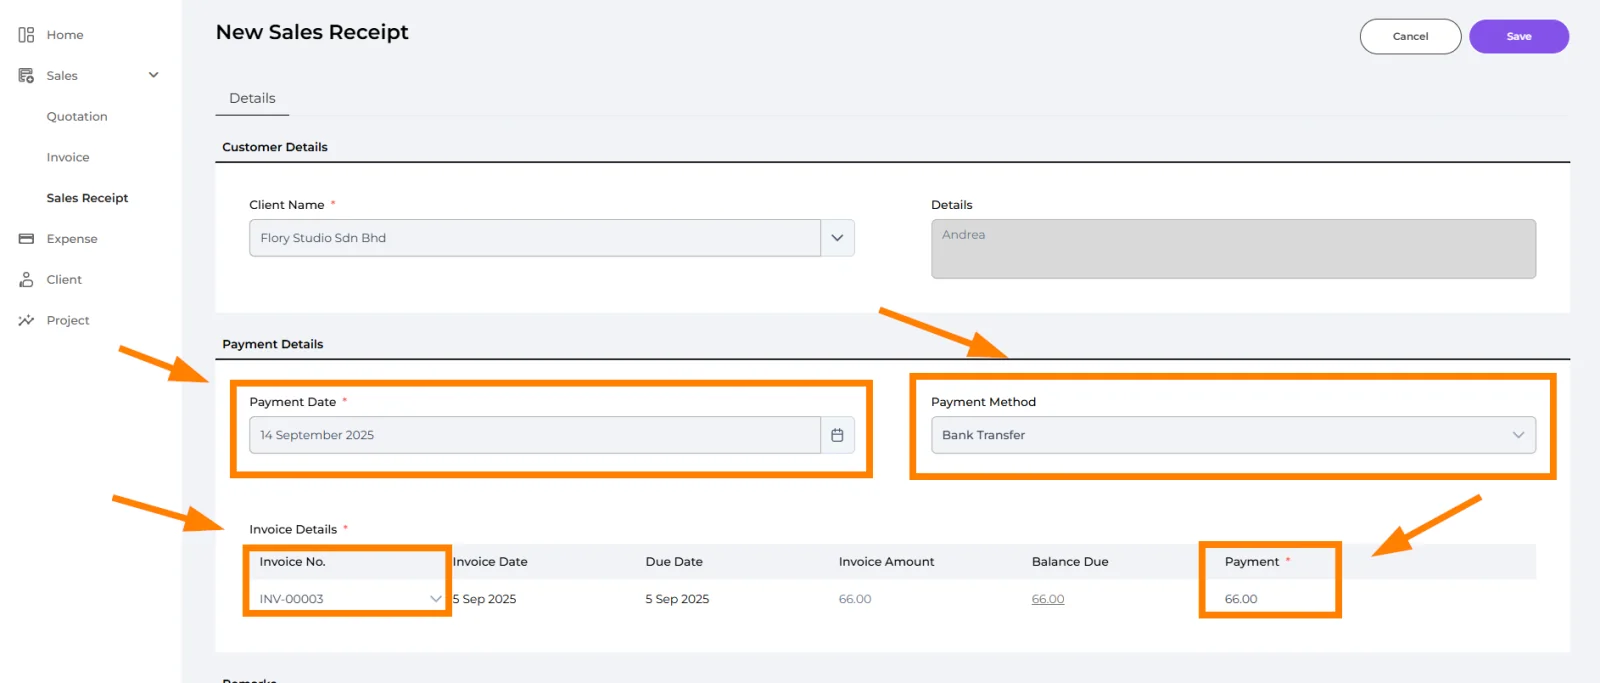
🔹 Payment Date (Required)
The date when the payment is made.
🔹 Payment Method
Method of payment is set to Bank Transfer by default.
🔹 Invoice Details (Required)
Select the invoice to which this payment applies.
Note: If the sales receipt is generated directly from an invoice, the invoice details will be auto populated.
🔹 Payment (Required)
Enter the amount paid for the transaction.
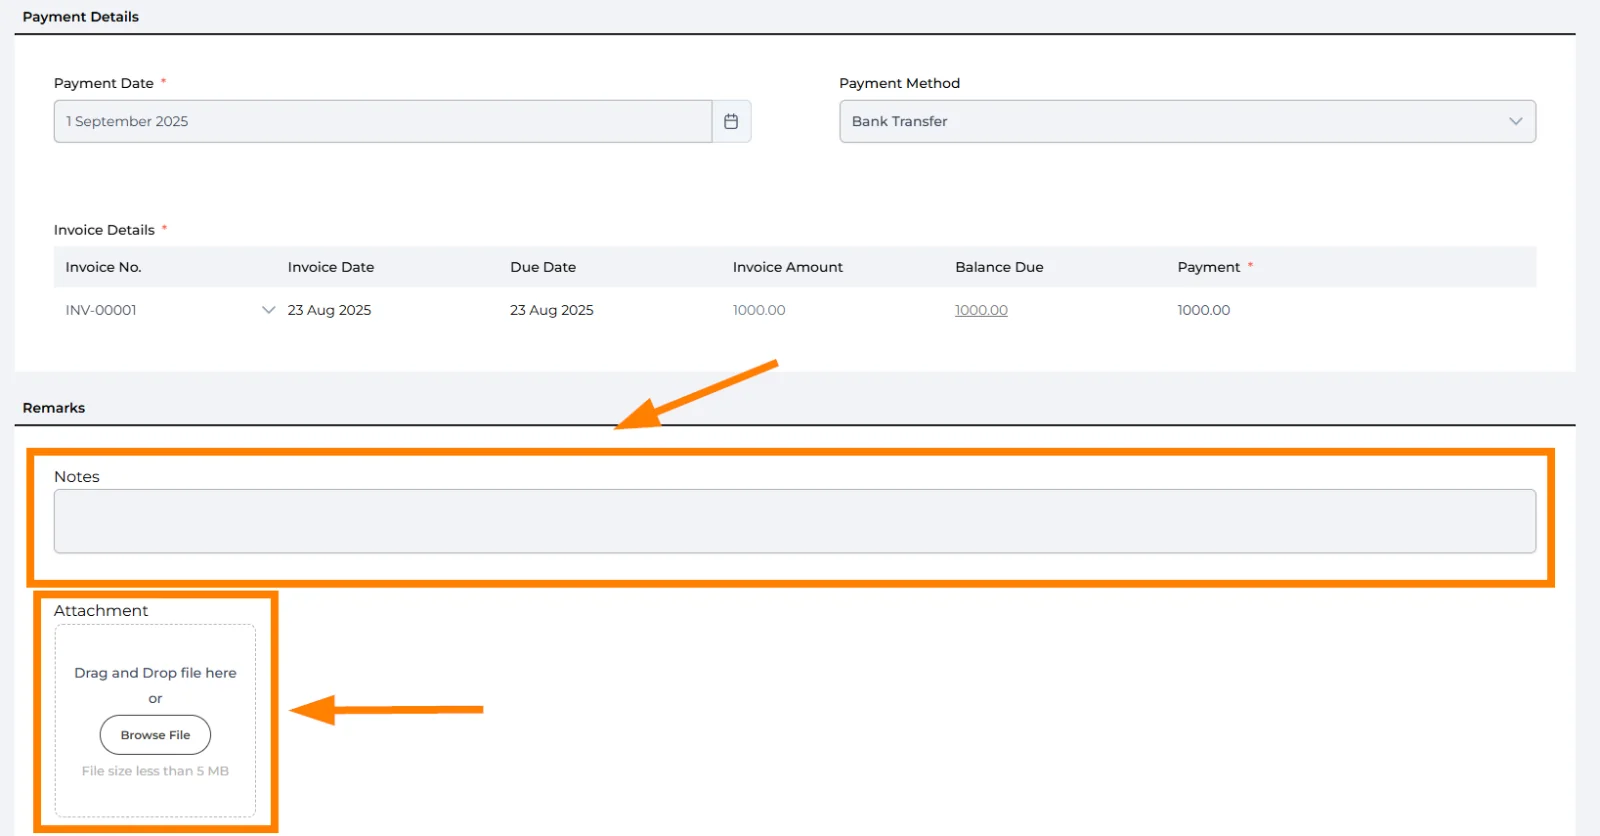
🔹 Notes (Optional)
Add any additional information or remarks related to the payment.
🔹Attachment (Optional)
Upload supporting documents (e.g., payment proof, bank slip, or related files) to keep a complete record with the sales receipt.
Click the "Save" button to store the sales receipt details. Sales Receipt is created! 🎉
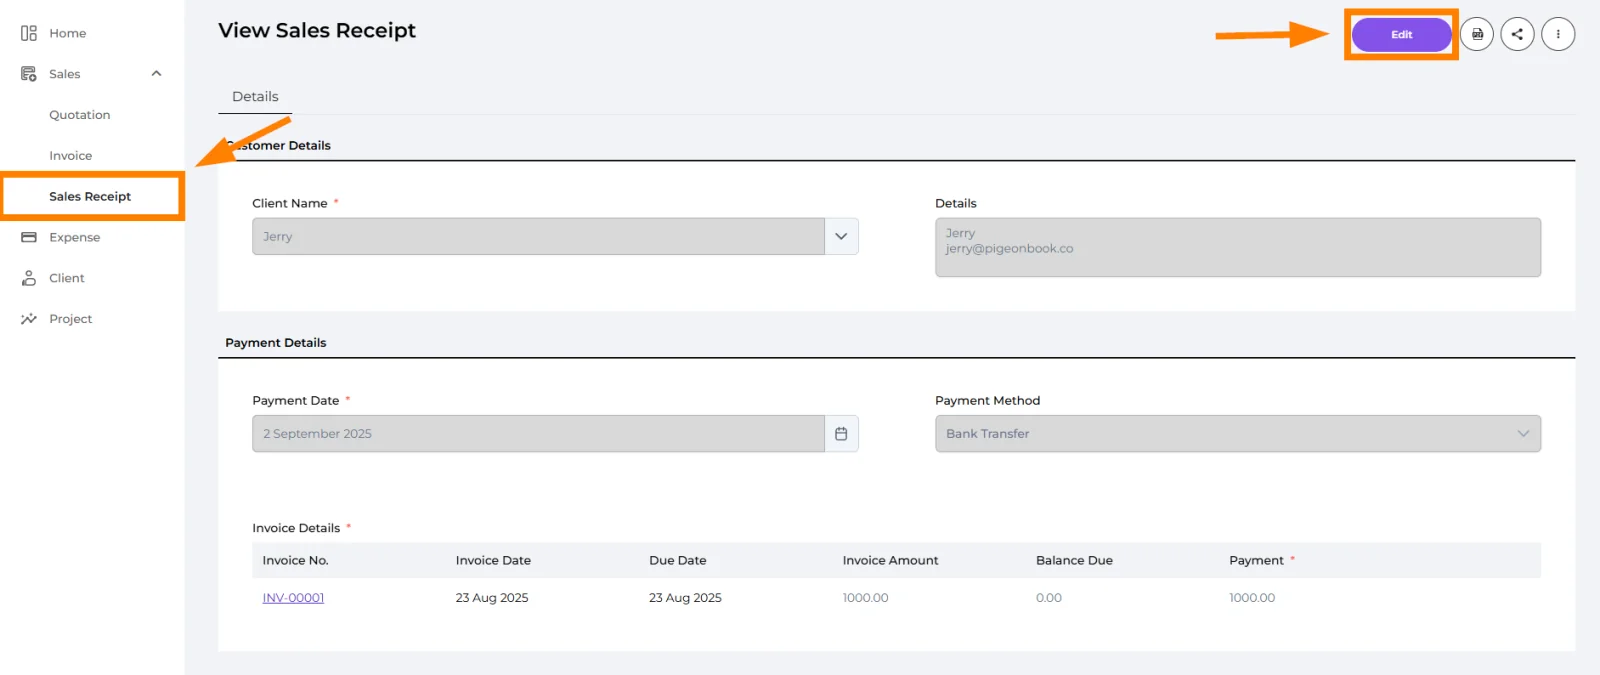
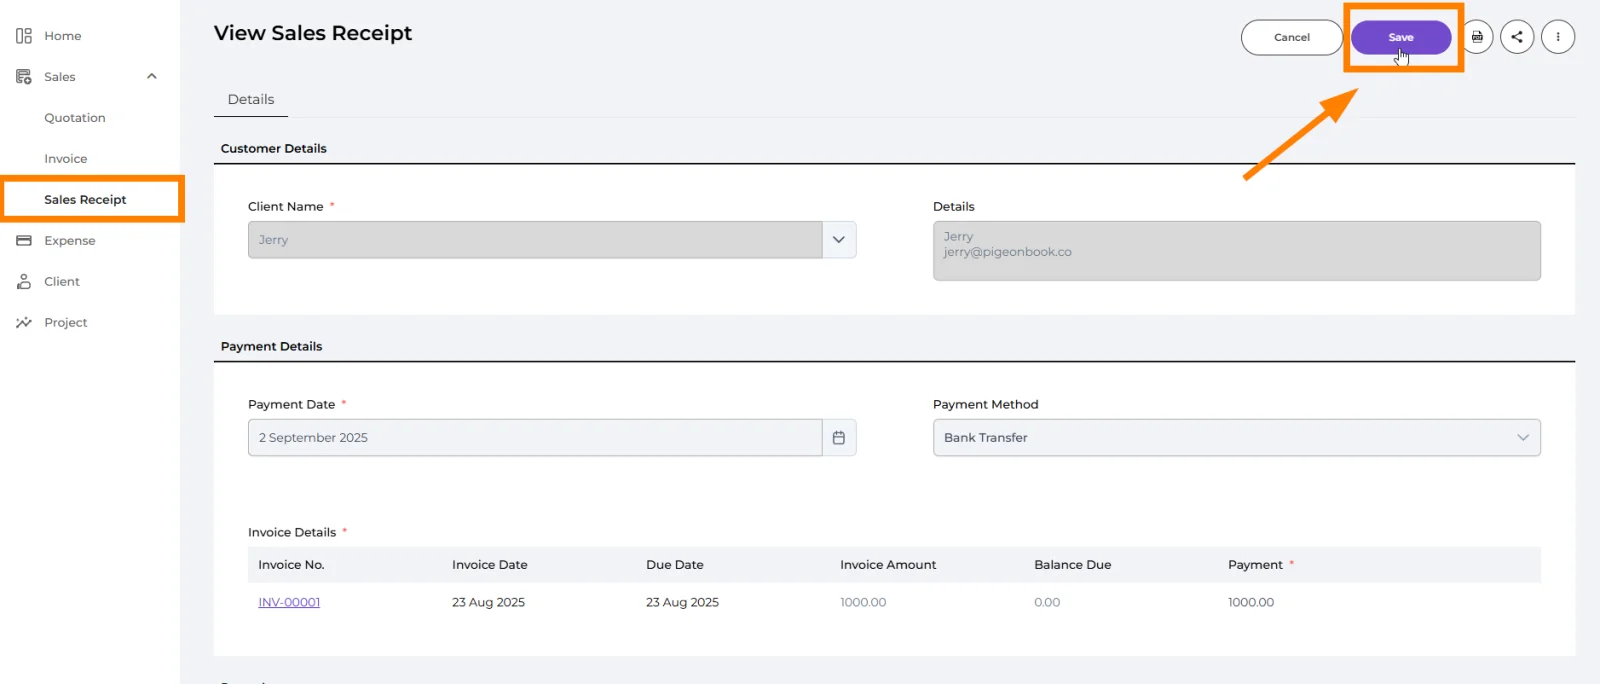
To make changes to sales receipt details, click "Edit", update the details as needed, and then click "Save" to store the updates.
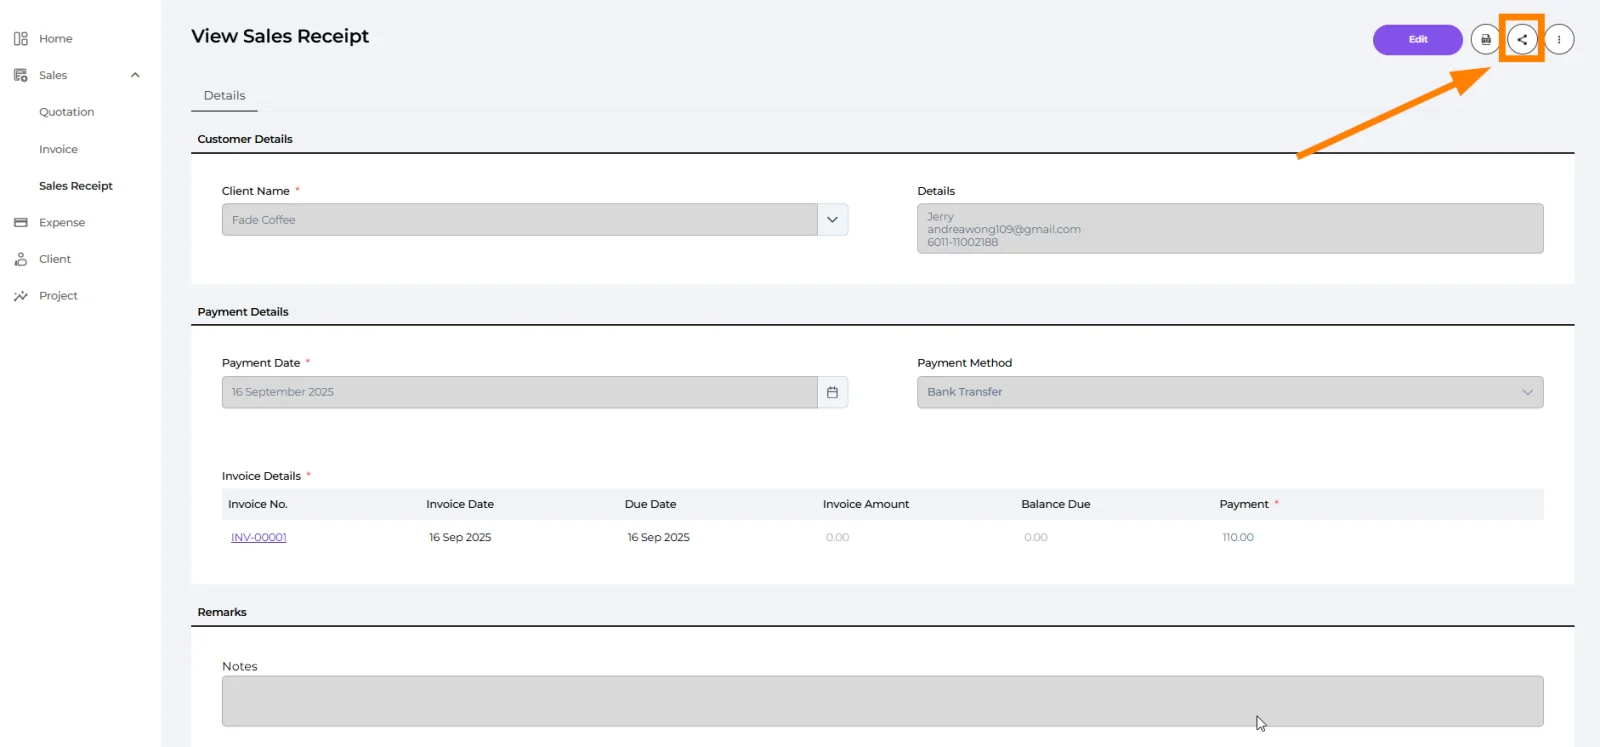
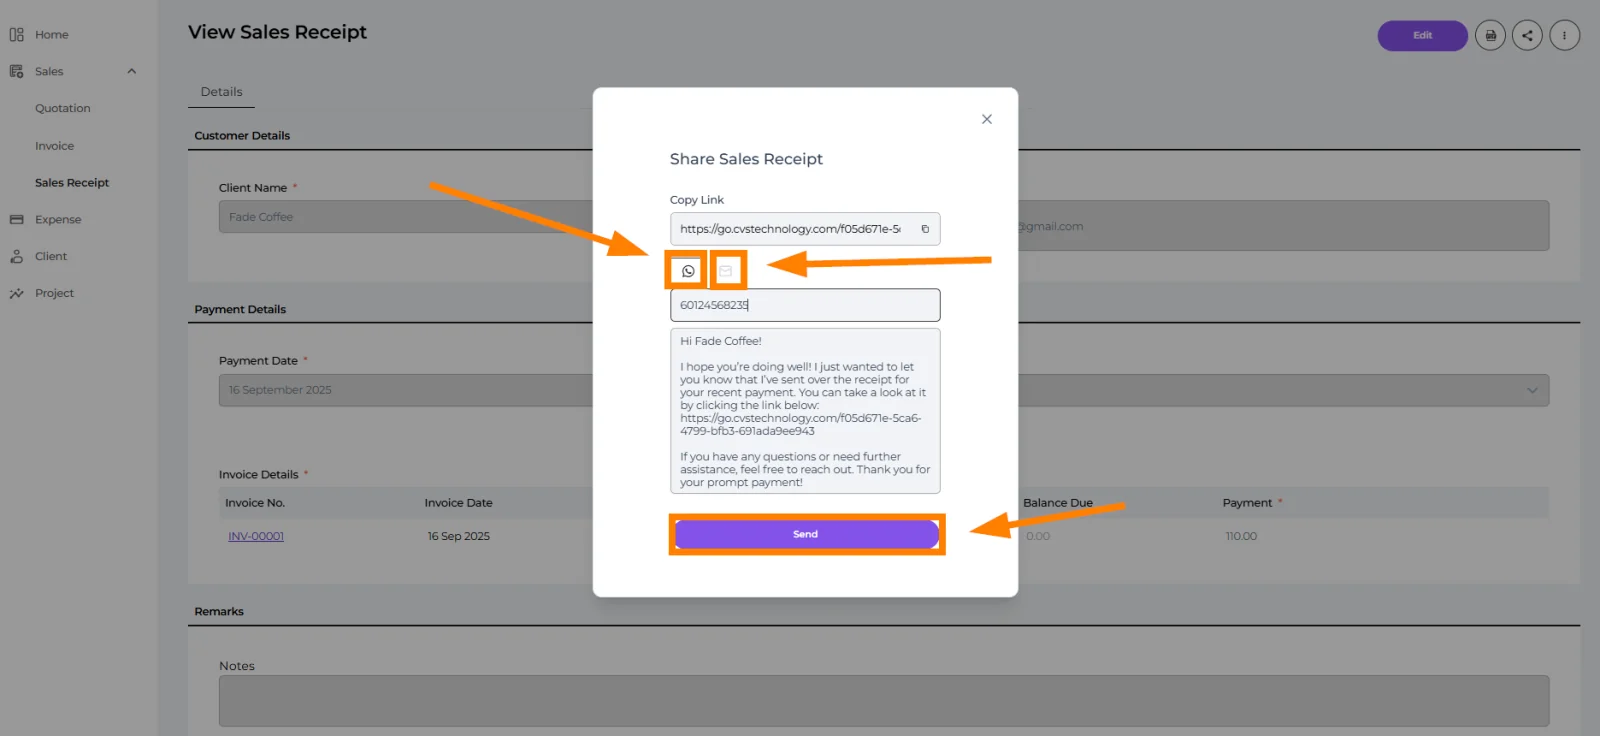
Click the Share button to send the quotation directly, either by WhatsApp or Email
- WhatsApp – Contact number and default message autofill. Edit if needed, then Send.
- Email – Email address and default message autofill. Edit if needed, then Send.
💡 Tip: Ensure client details (phone & email) are filled in so fields populate automatically.
Well done! You’ve finished this guide.
You can go back to any step at any time.