

Pigeonsend (WhatsApp Upload Receipts)
Snap your receipt and send it via WhatsApp — Pigeonsend uploads it instantly for you.
Navigate to Settings. In the Contact Number field, you will see a red exclamation mark indicating “Mobile not verified".
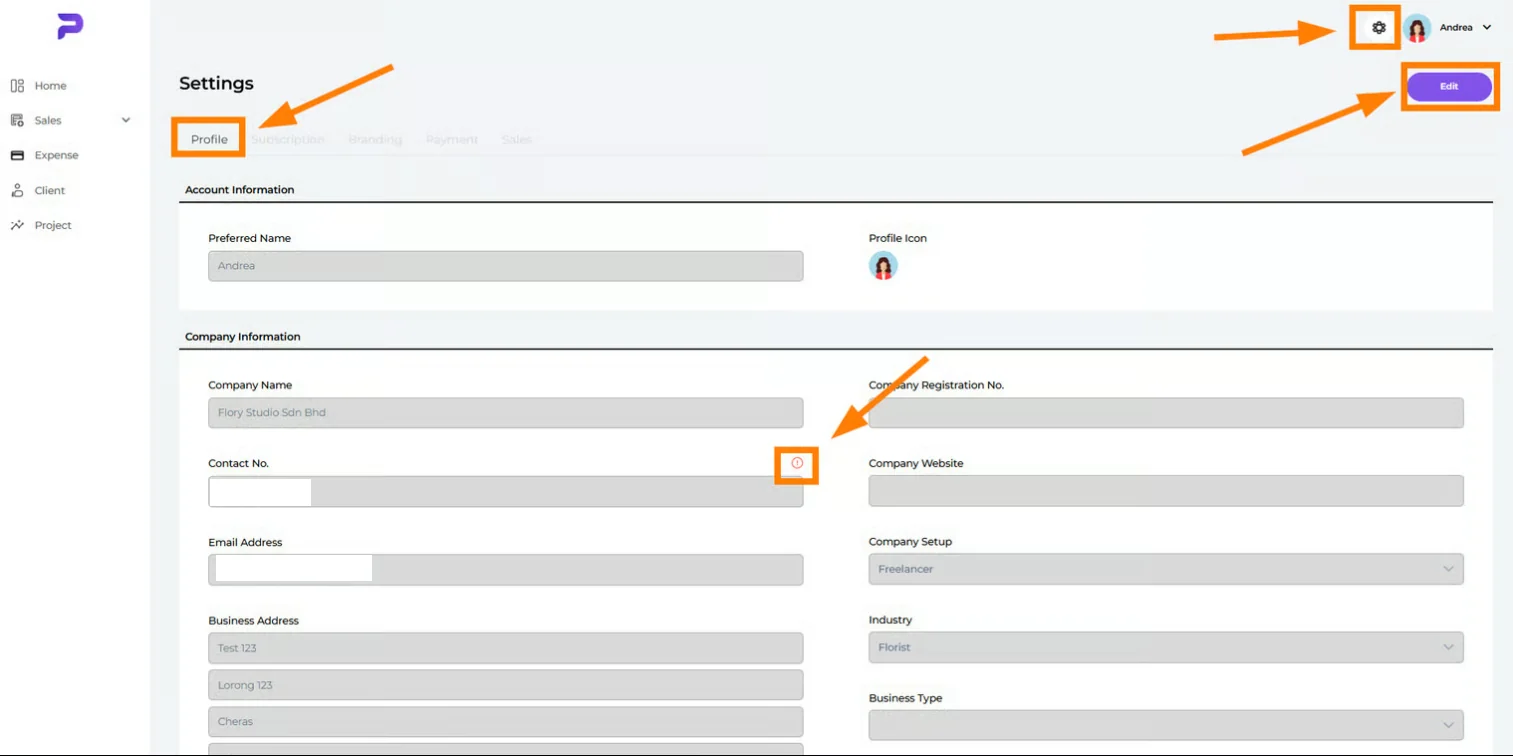
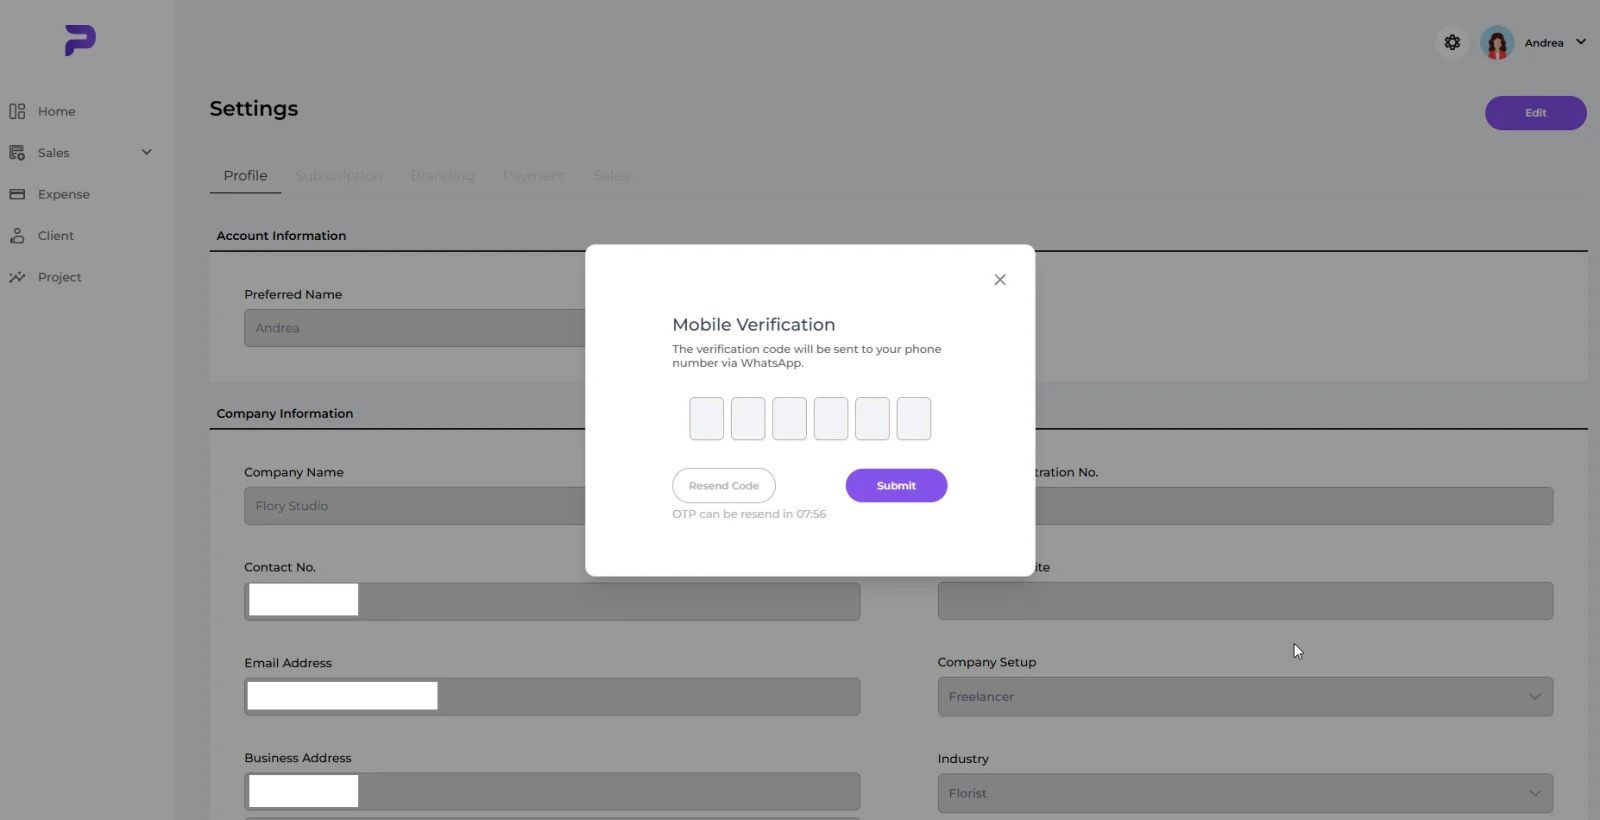
Click the red icon to open the mobile verification pop-up. Retrieve the 6-digit verification code sent to your WhatsApp.
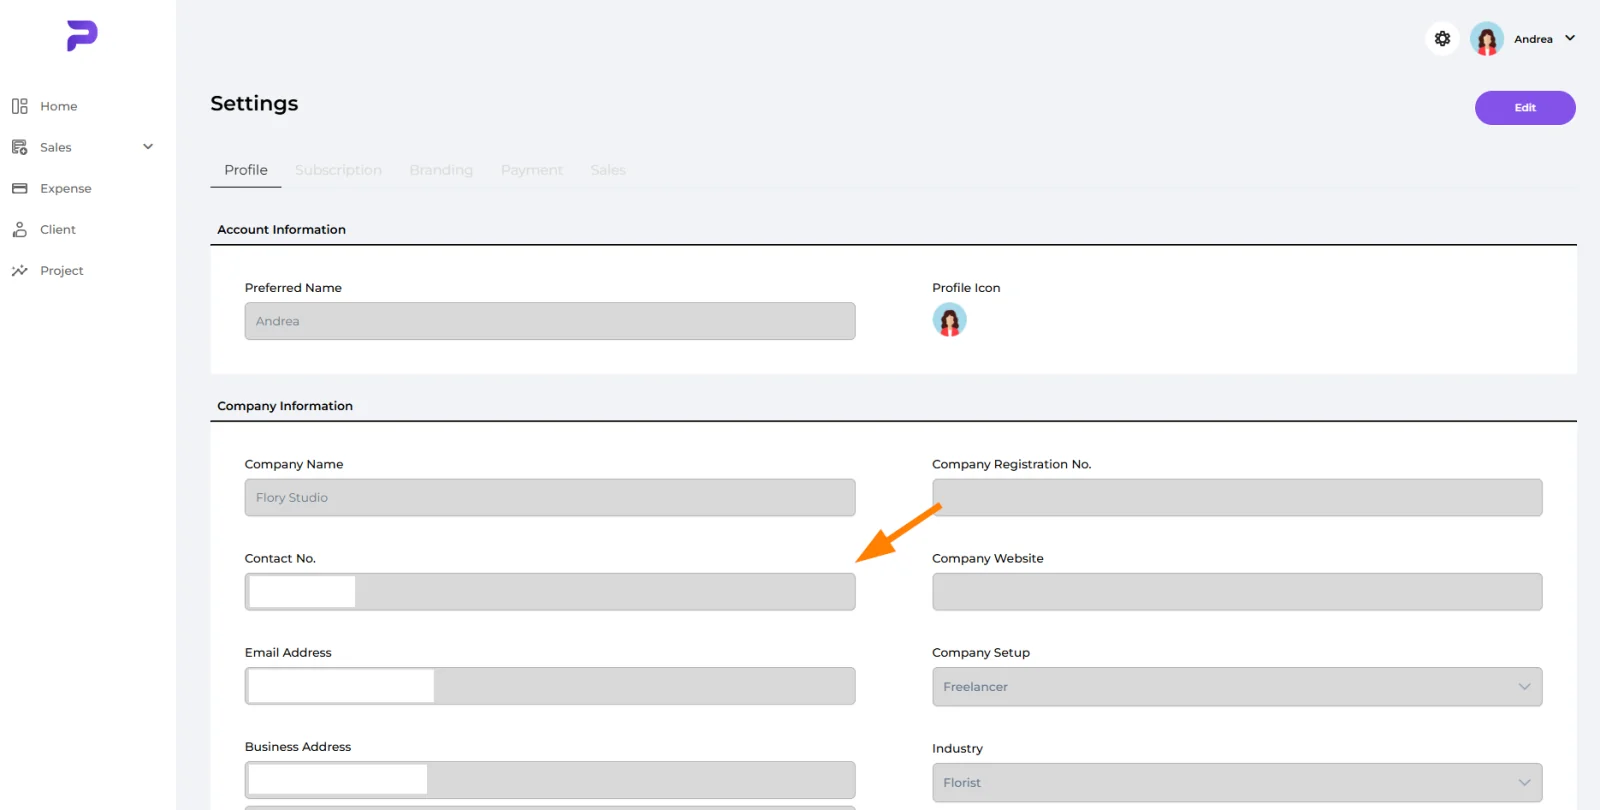
Upon successful verification, a confirmation pop-up will appear indicating that the verification is complete. The red icon next to the Contact Number field will no longer be displayed.
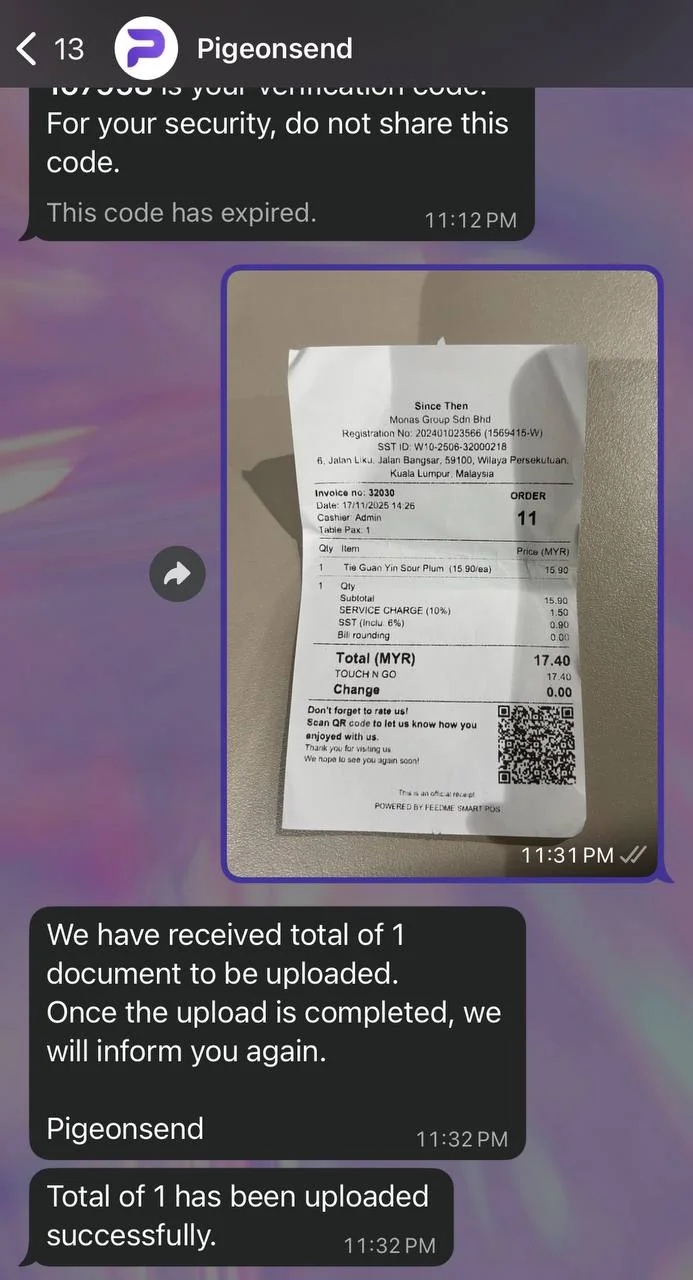
Navigate to Pigeonsend’s WhatsApp chat. Tap the Camera icon and take a photo of your receipt. Upload the image and wait momentarily.
Pigeonsend will send a confirmation message once the receipt has been successfully uploaded to Pigeonbook platform.
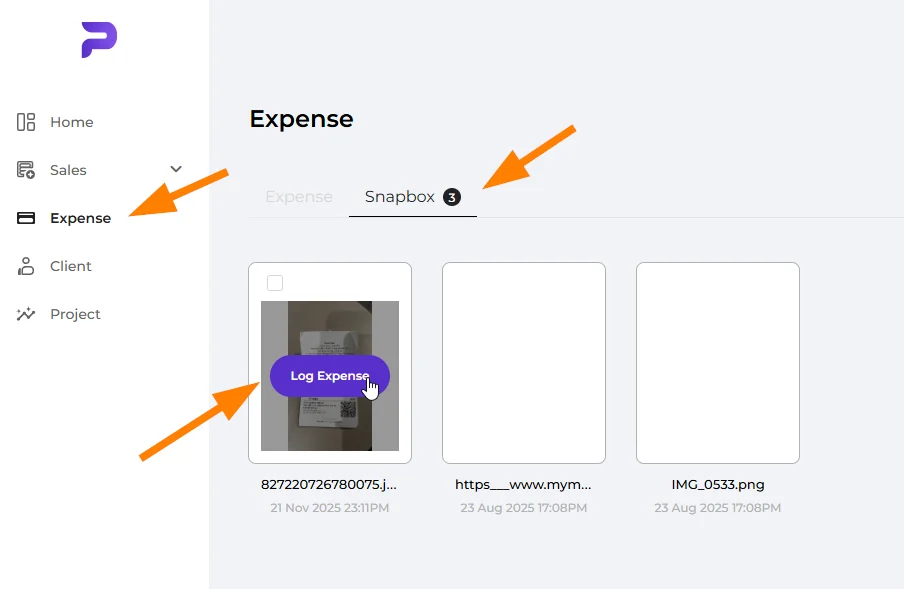
Navigate to Expenses on the left menu, then select the Snapbox tab. Locate your uploaded receipt and click Log Expense to begin recording it.
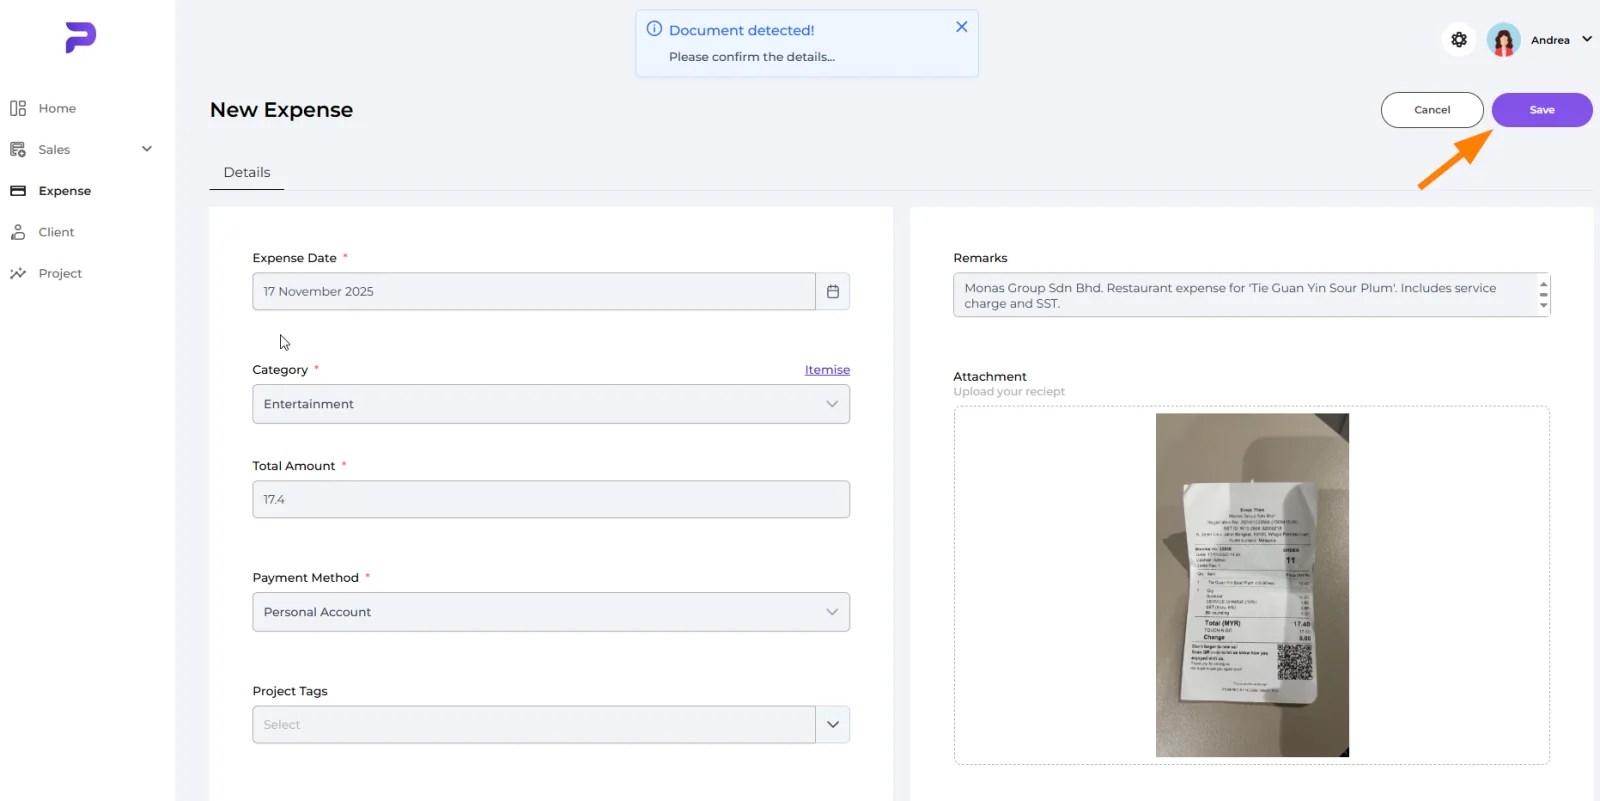
Voila! The AI will automatically detect the expense date, category, and total amount from your receipt.
Review these details and select the appropriate Payment Method (Personal Account or Business Account). You may also add Project Tags if applicable.
For the Remarks field, the AI will generate a descriptive summary based on your receipt - feel free to edit it as needed.
Once you have confirmed all fields, click Save to complete your expense entry.
Well done! You’ve finished this guide.
You can go back to any step at any time.