

Setting up your account
Settings is a page where you update your profile, branding, payment and sales related settings.
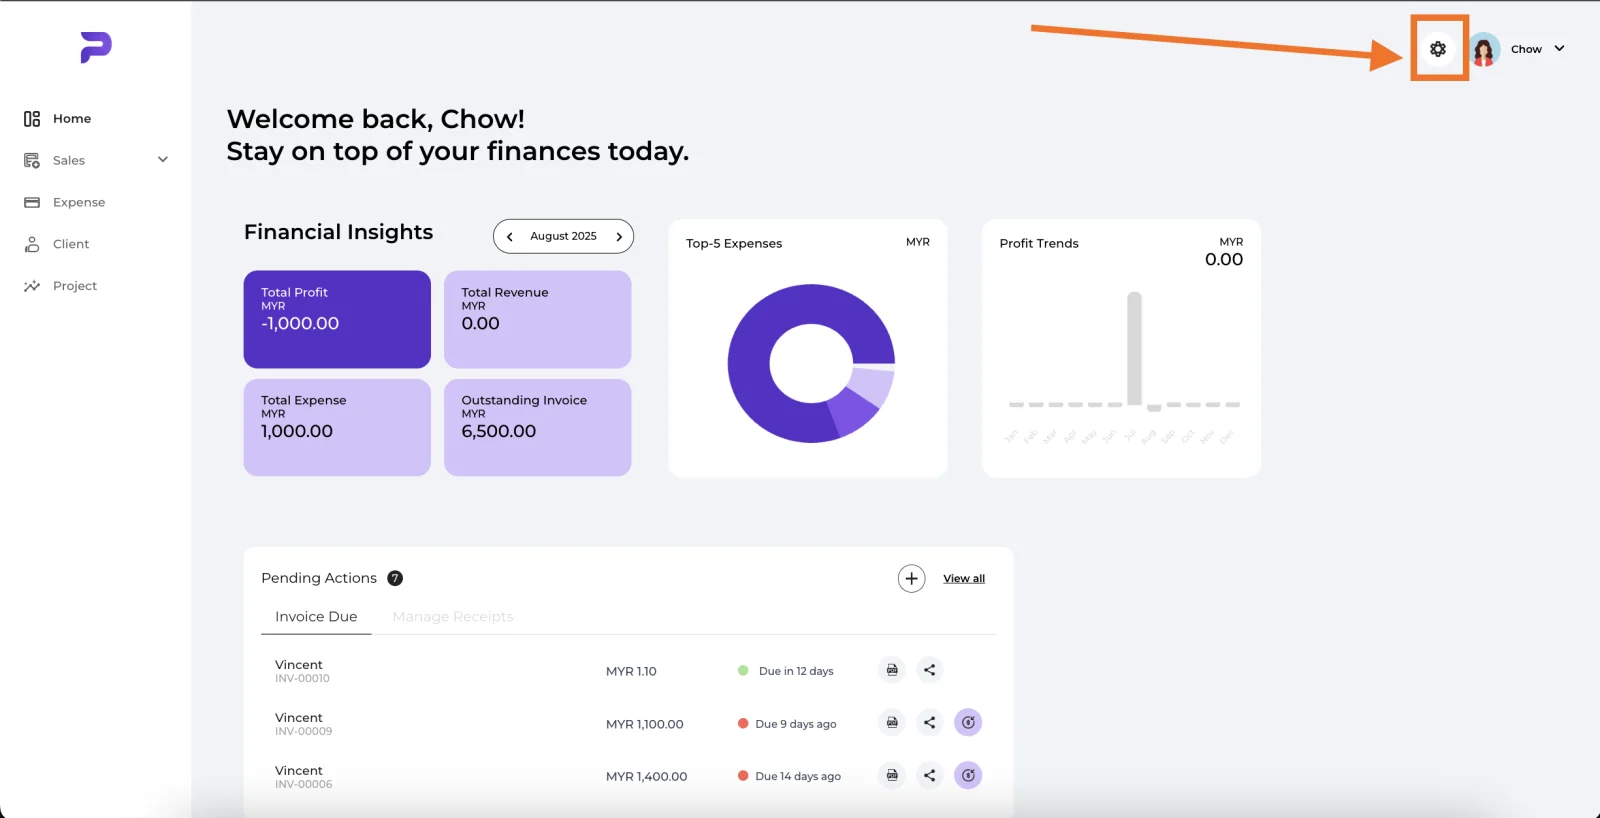

🔹 Preferred Name (Required)
The selected name will appear as nickname on your home screen
🔹 Profile Icon (Required)
The selected icon will appear on your home screen
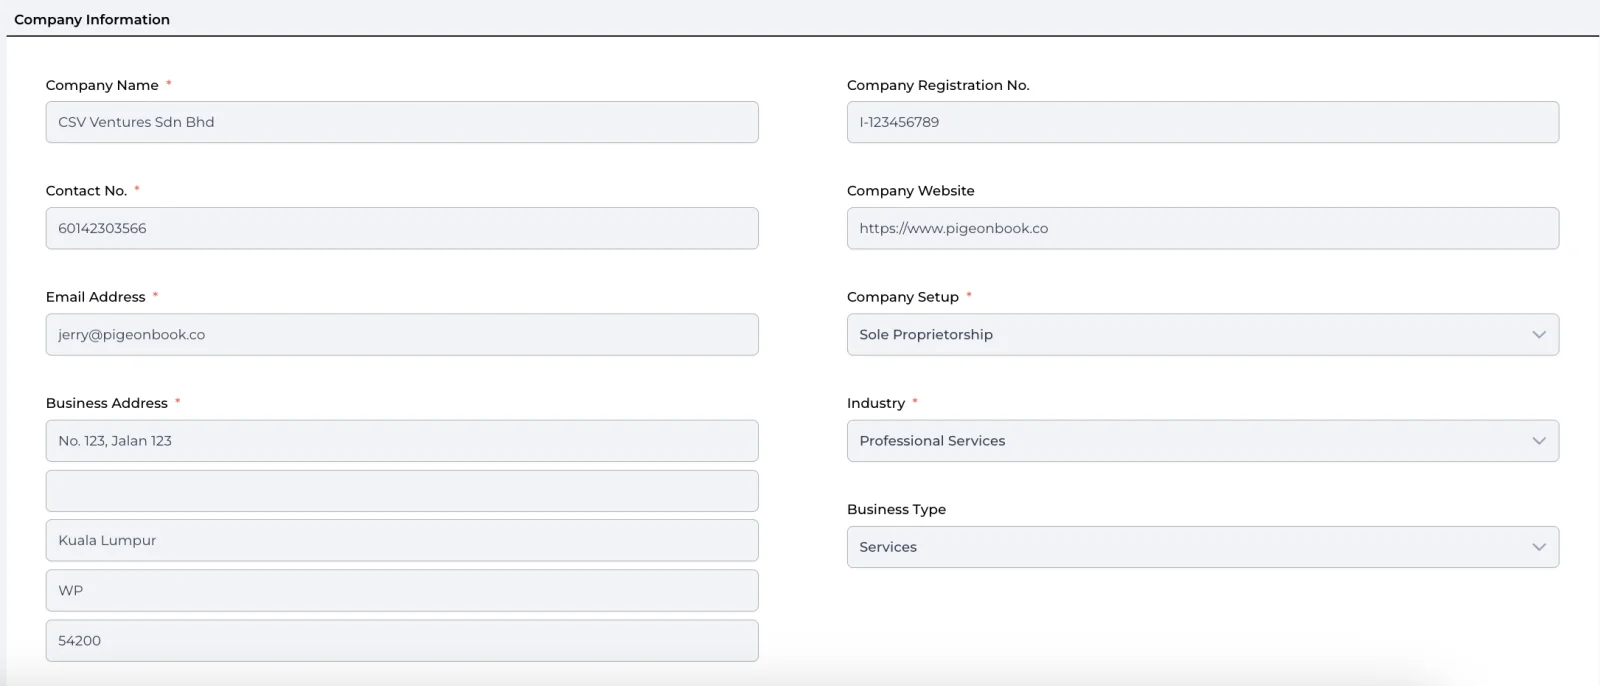
🔹 Company Name (Required)
The official registered name of your business (e.g. CSV Ventures Sdn Bhd)
🔹 Contact No. (Required)
The main contact number for your business, preferably with country code (e.g. 60149033566).
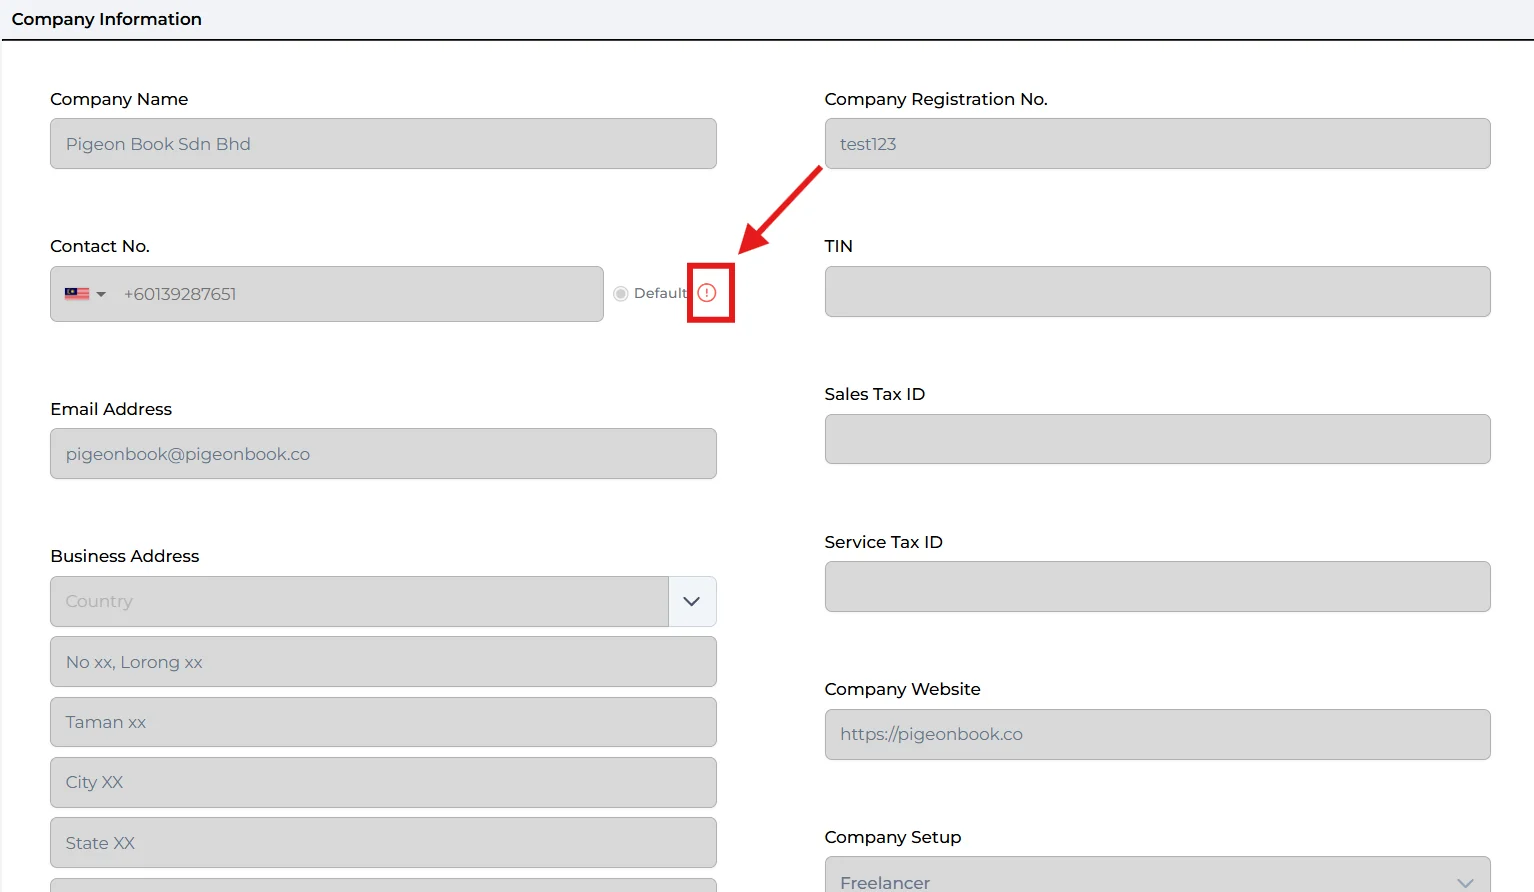
You can add more than one number by clicking "+ Add". Use the radio button to set one as the Default - this number is used for Pigeonsend and appears on your documents. If a number shows a red exclamation icon, it means "Mobile not verified" - see the Pigeonsend setup note below.
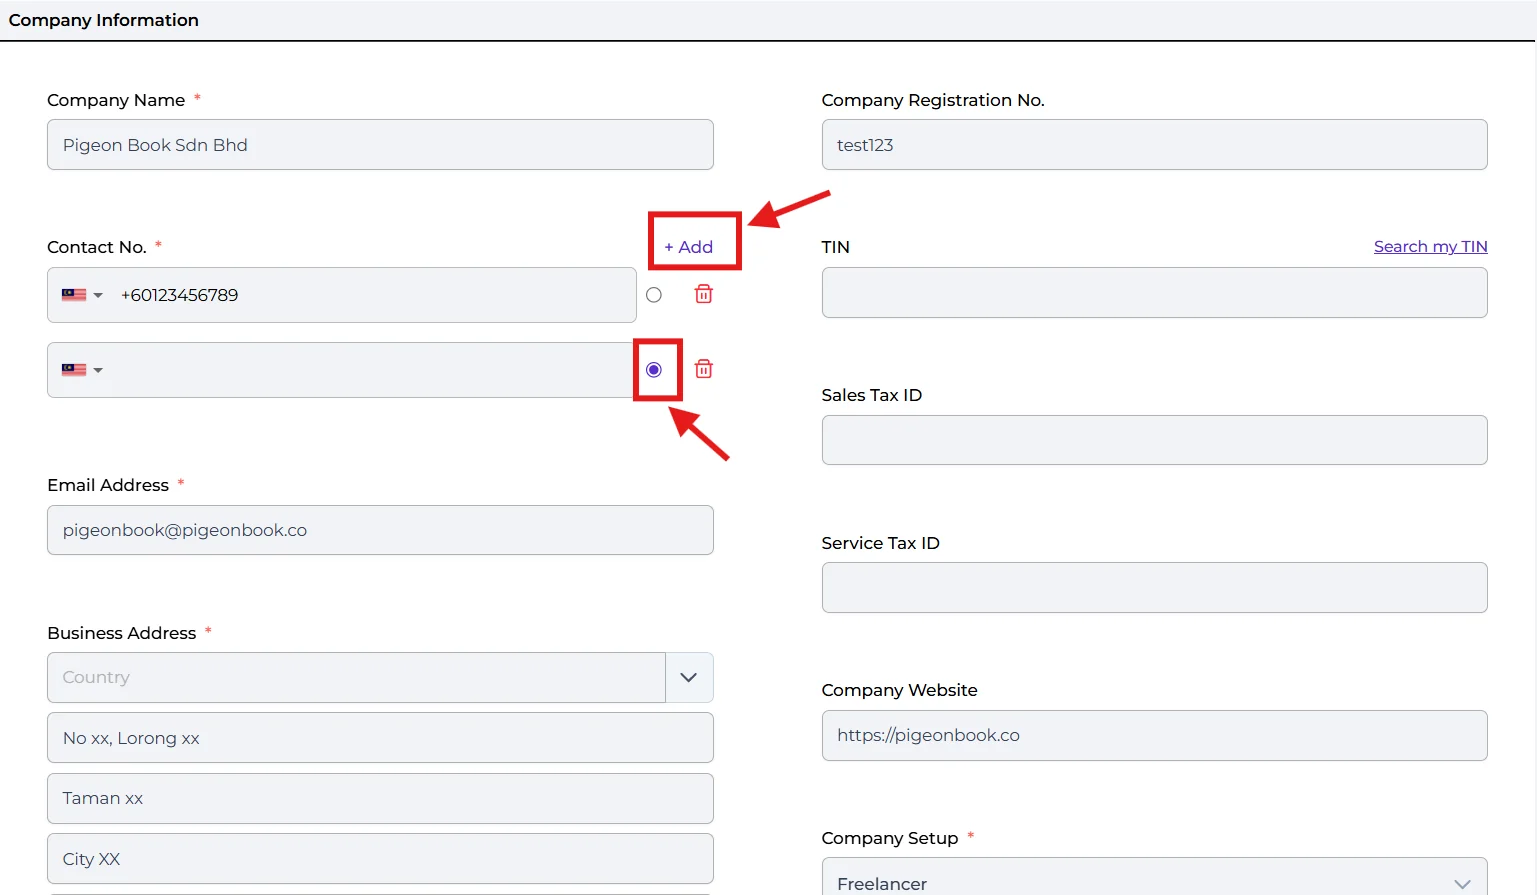
🔹 Email Address (Required)
A valid email address for business correspondence and notifications.
🔹 Business Address (Required)
The registered address of your business.
🔹 Company Registration No. (Optional)
Your business registration number as issued by SSM or relevant authority (e.g. Sdn Bhd, Enterprise, LLP).
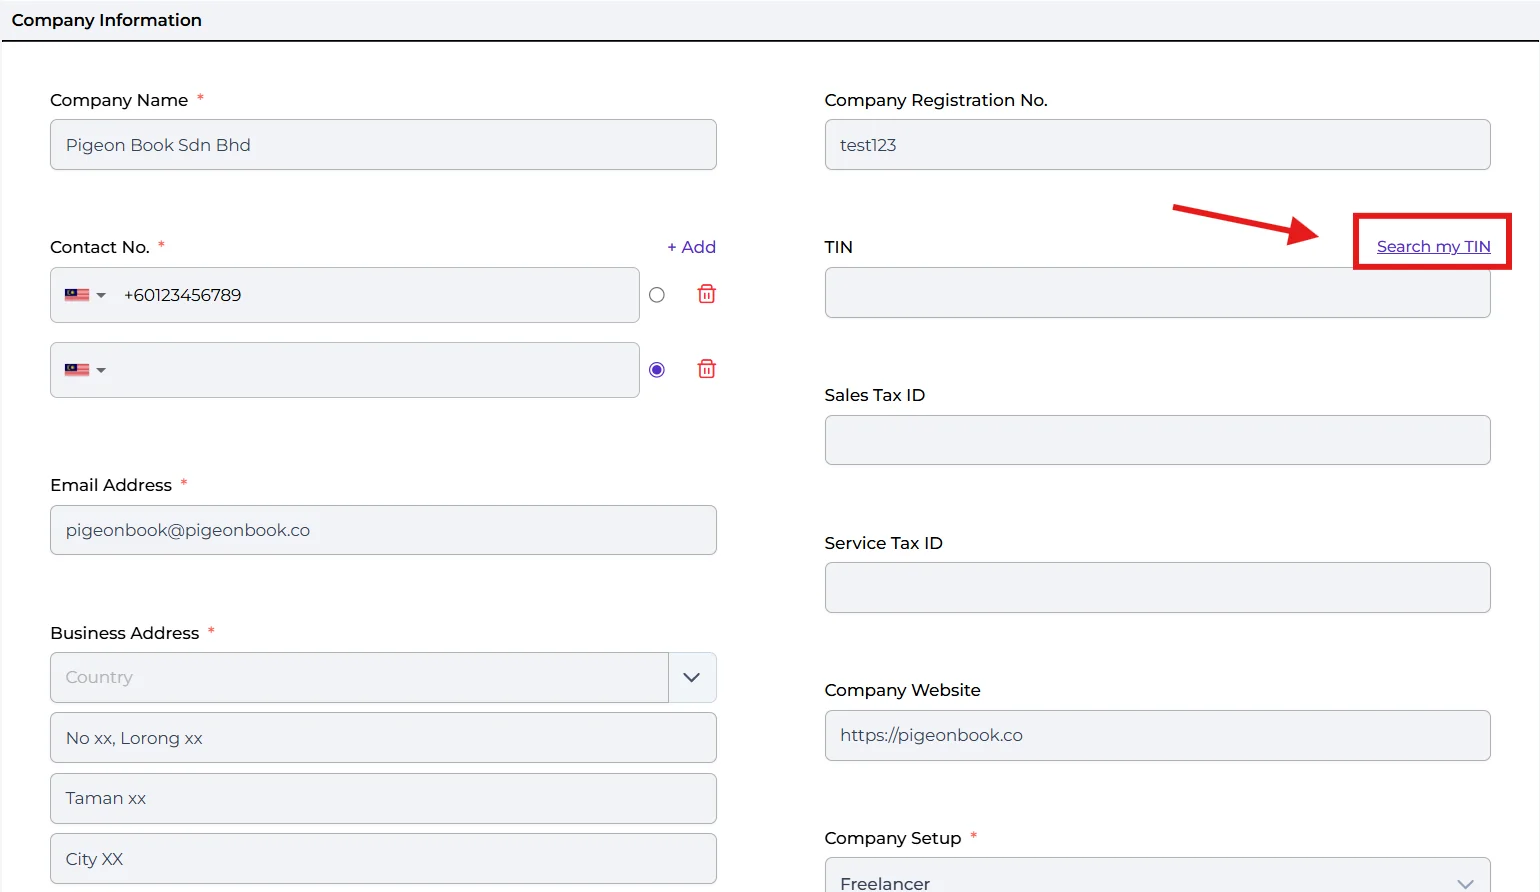
🔹 TIN (Optional)
Your Tax Identification Number, used for e-invoice. If you're unsure, click "Search my TIN" (enter your Company Registration No. and Company Setup) and we'll look it up for you.
🔹 Sales Tax ID (Optional)
Your Sales Tax registration number, if applicable.
🔹 Service Tax ID (Optional)
Your Service Tax registration number, if applicable.
🔹 Company Website (Required)
The official website URL of your company for reference or public view.
🔹 Company Setup (Optional)
Your legal business structure, such as Sole Proprietorship, Sdn Bhd, or LLP.
🔹 Industry (Required)
The industry your business operates in (e.g. Professional Services, Retail, F&B)
🔹 Business Type (Optional)
The nature of your business operations, such as Products, Services, or Both.
🔹 Pigeonsend setup
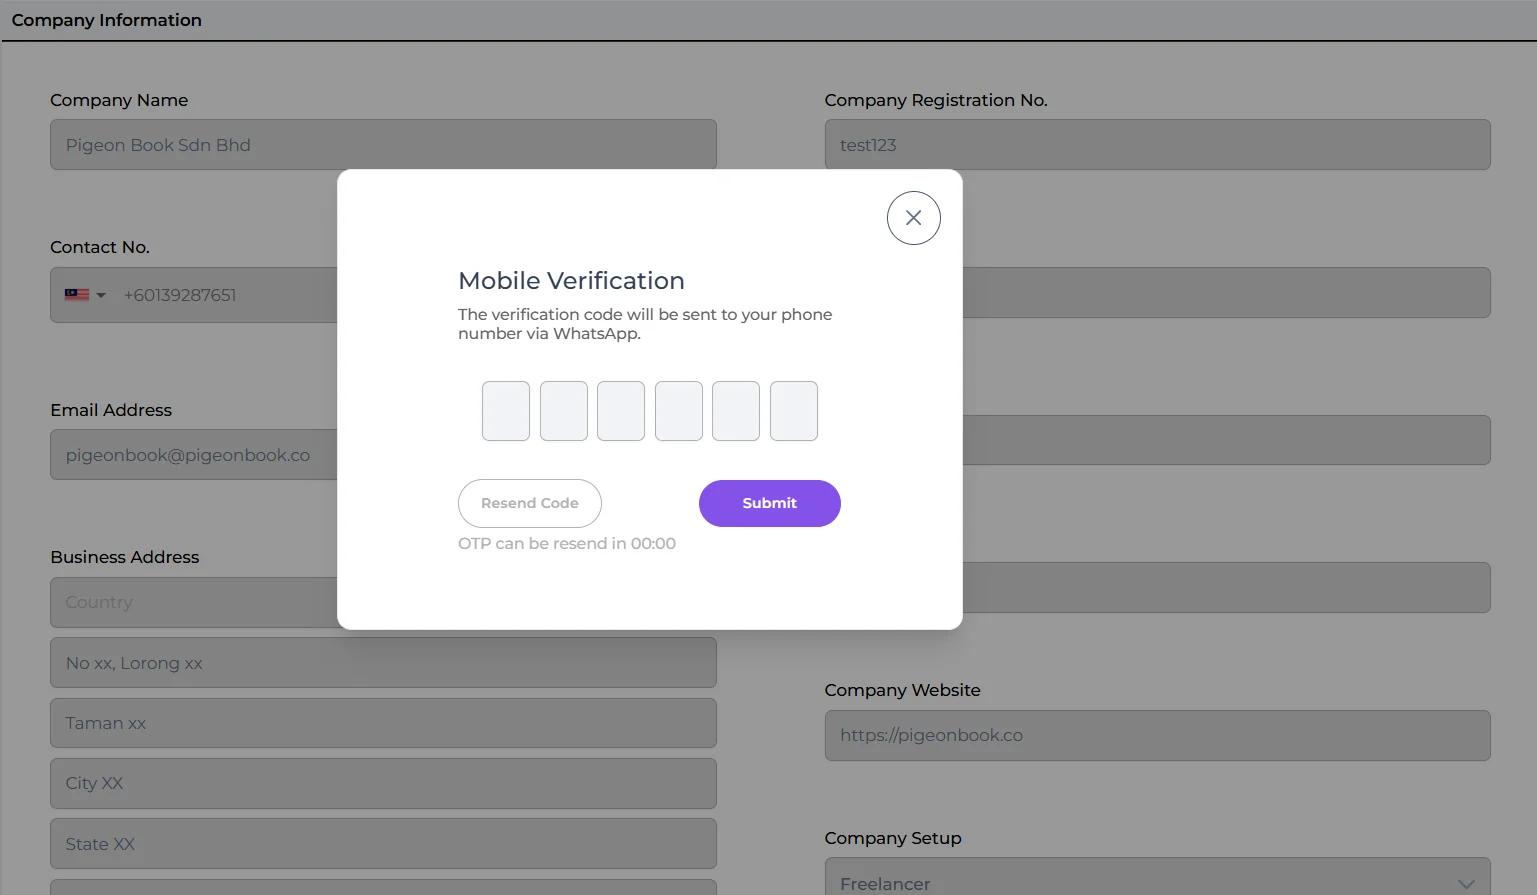
To enable Pigeonsend (snap a receipt and sent it via WhatsApp), verify your contact number: click the red exclamation icon next to a Contact No., enter the 6-digit code sent to your WhatsApp, and you're done. The red icon disappears once verified.
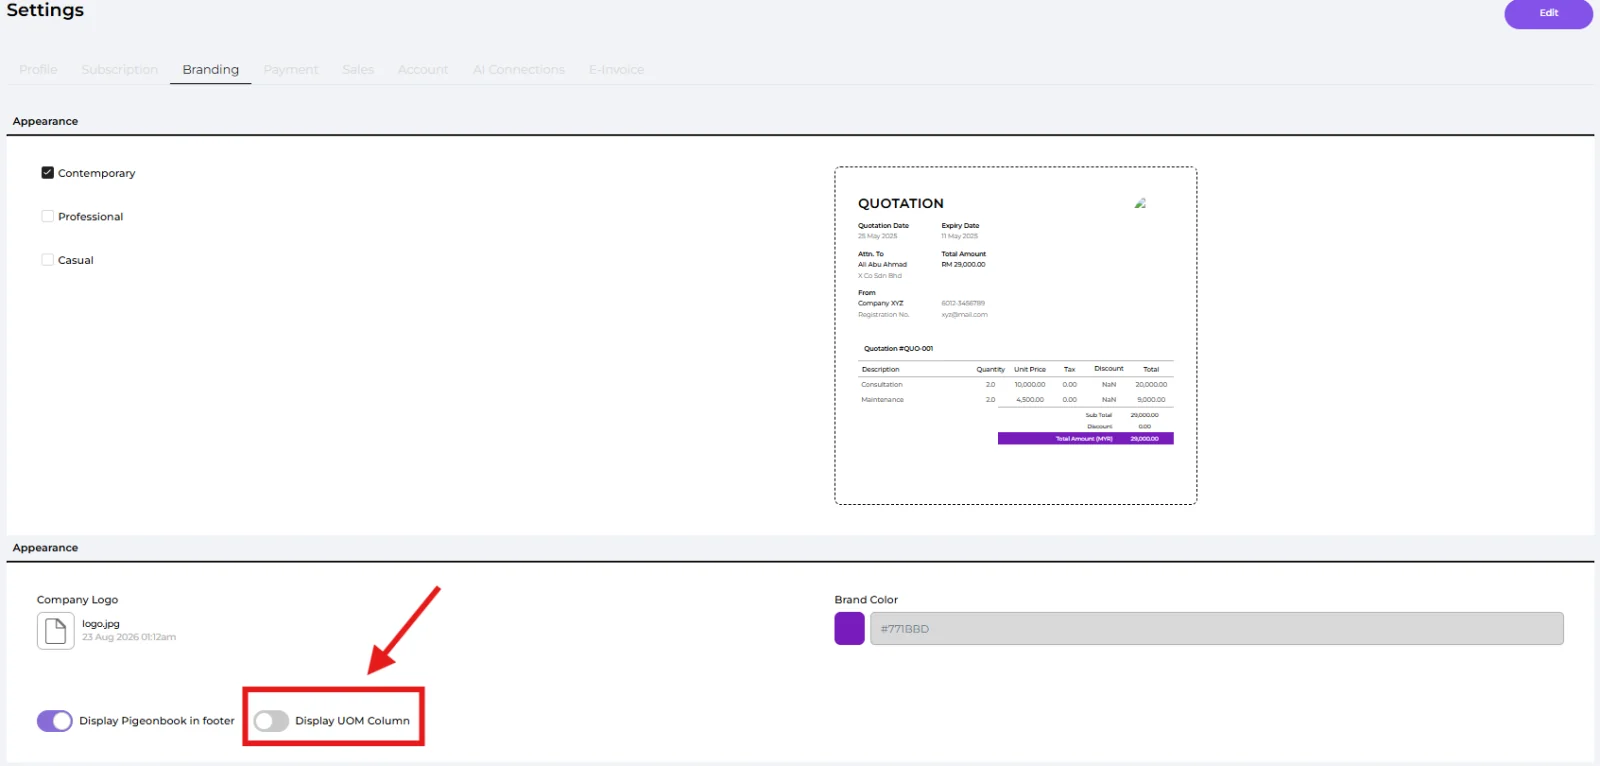
🔹 Appearance (Required)
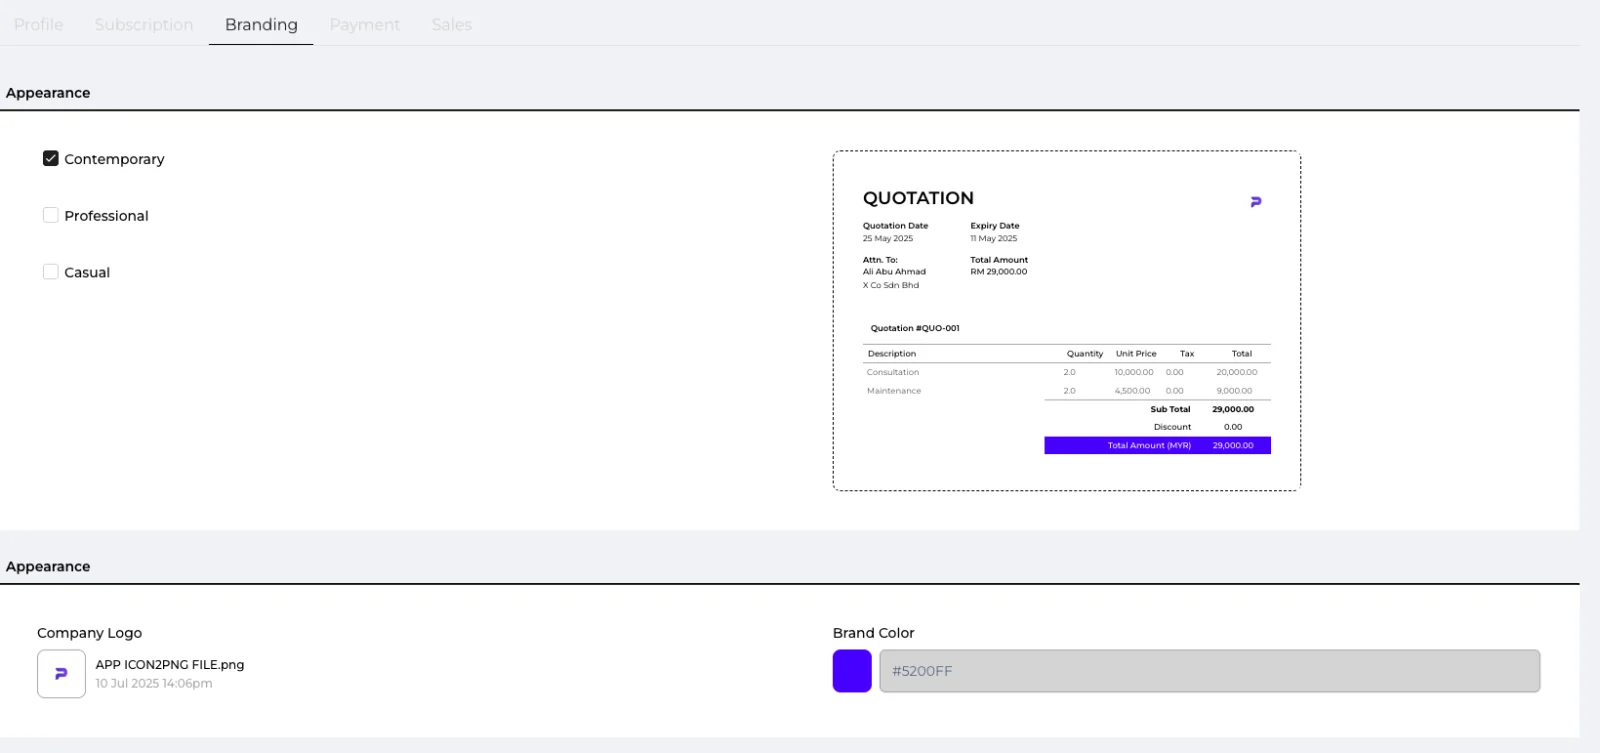
Select a template of your choice, this will apply to all your Quotation & Invoice layout.
🔹 Company Logo (Required)
Upload your company logo, this will appear in Quotation, Invoice & Sales Receipt.
🔹 Brand Color (Required)
Select your brand color, this will appear in Quotation, Invoice & Sales Receipt.
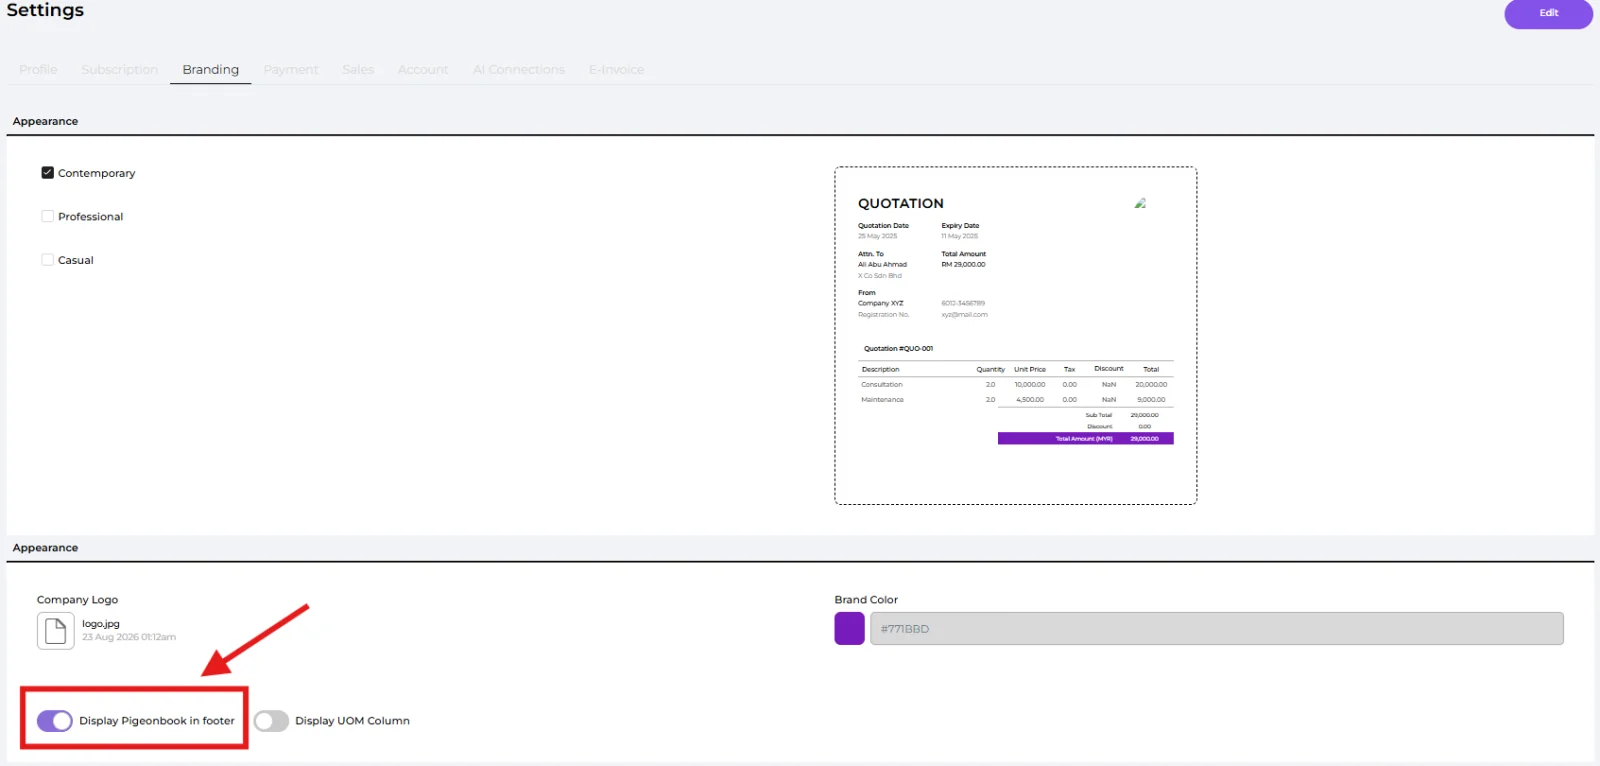
🔹 Display Pigeonbook in footer (Optional)
Toggle whether the "Pigeonbook" wordmark appears at the bottom of your Quotation, Invoice & Sales Receipt. Turn it off to remove the branding.
(Note: this option is only available on plans that support watermark removal.)
🔹 Display UOM Column (Optional)
Toggle whether a Unit of Measure (UOM) column appears on your documents. The unit shown comes from the unit set on each product.
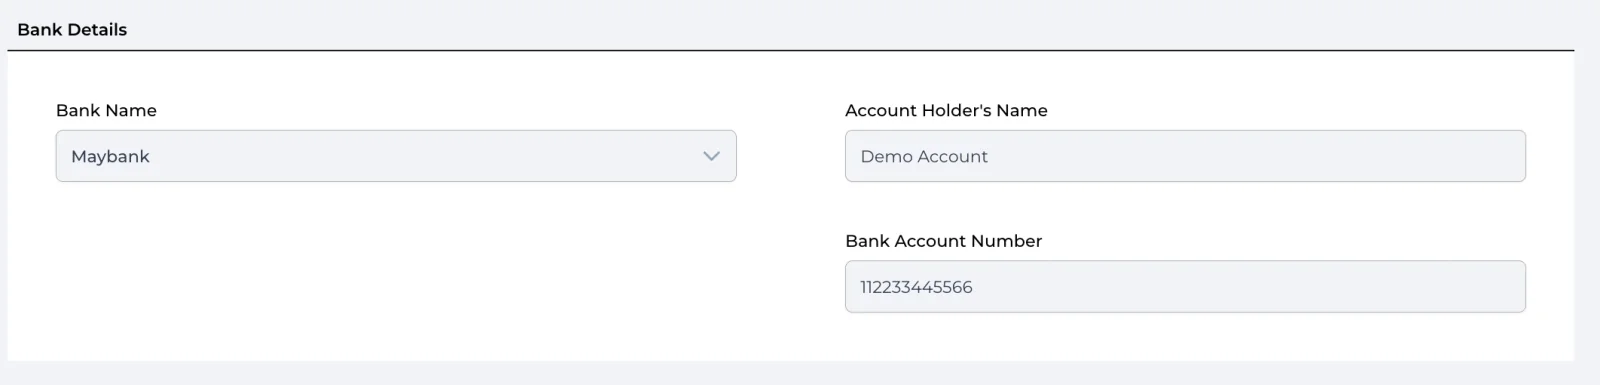
🔹 Bank Name (Required)
Select your company's bank (e.g. Maybank, CIMB, Public Bank).
🔹 Account Holder's Name (Required)
The exact name registered with the bank for this account.
🔹 Bank Account Number (Required)
Your full bank account number used for receiving payments and transfers.
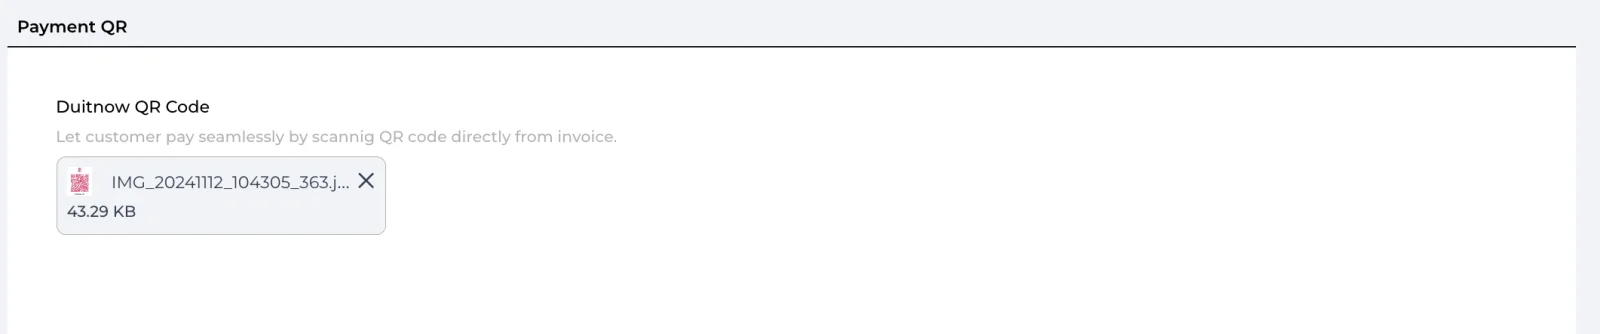
🔹 Duitnow QR Code (Required)
Upload your business's DuitNow QR code to allow customers to make payments directly by scanning the QR on your invoice.
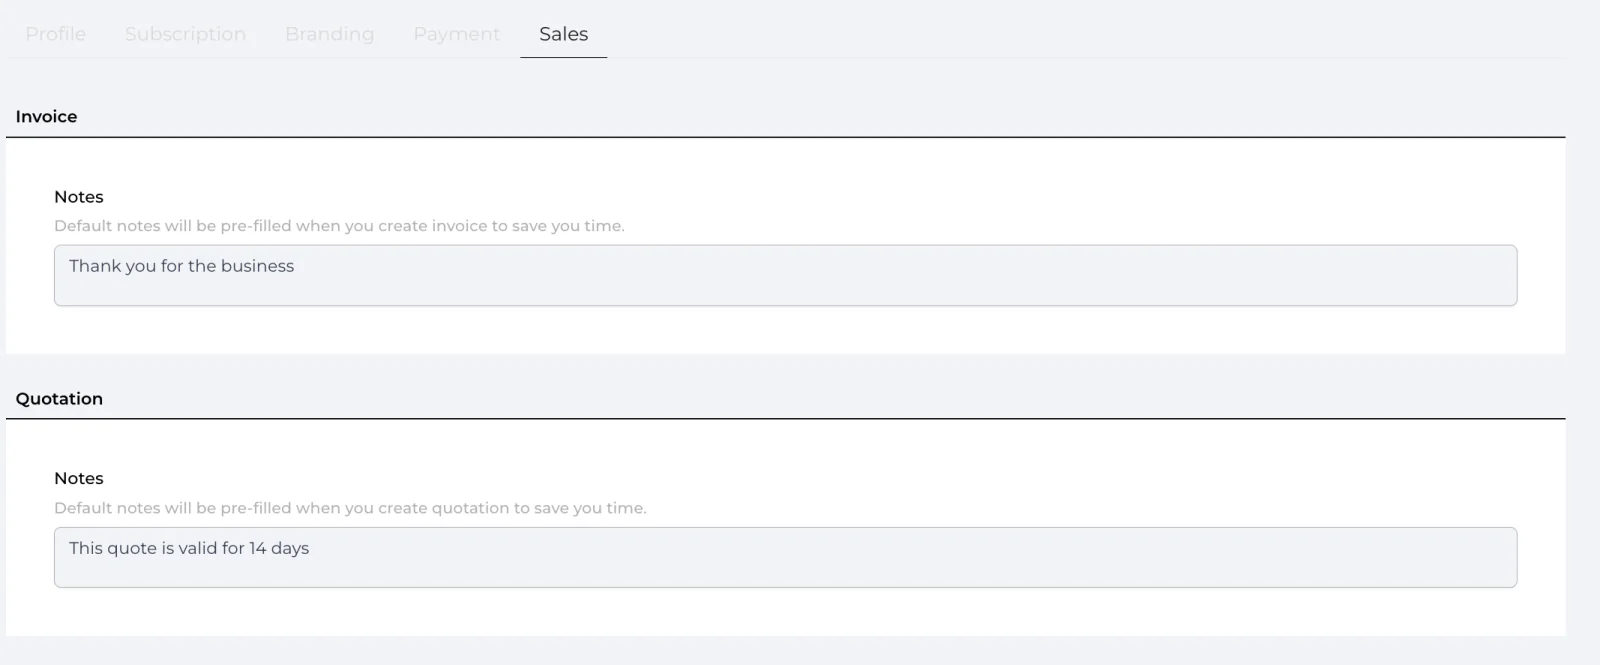
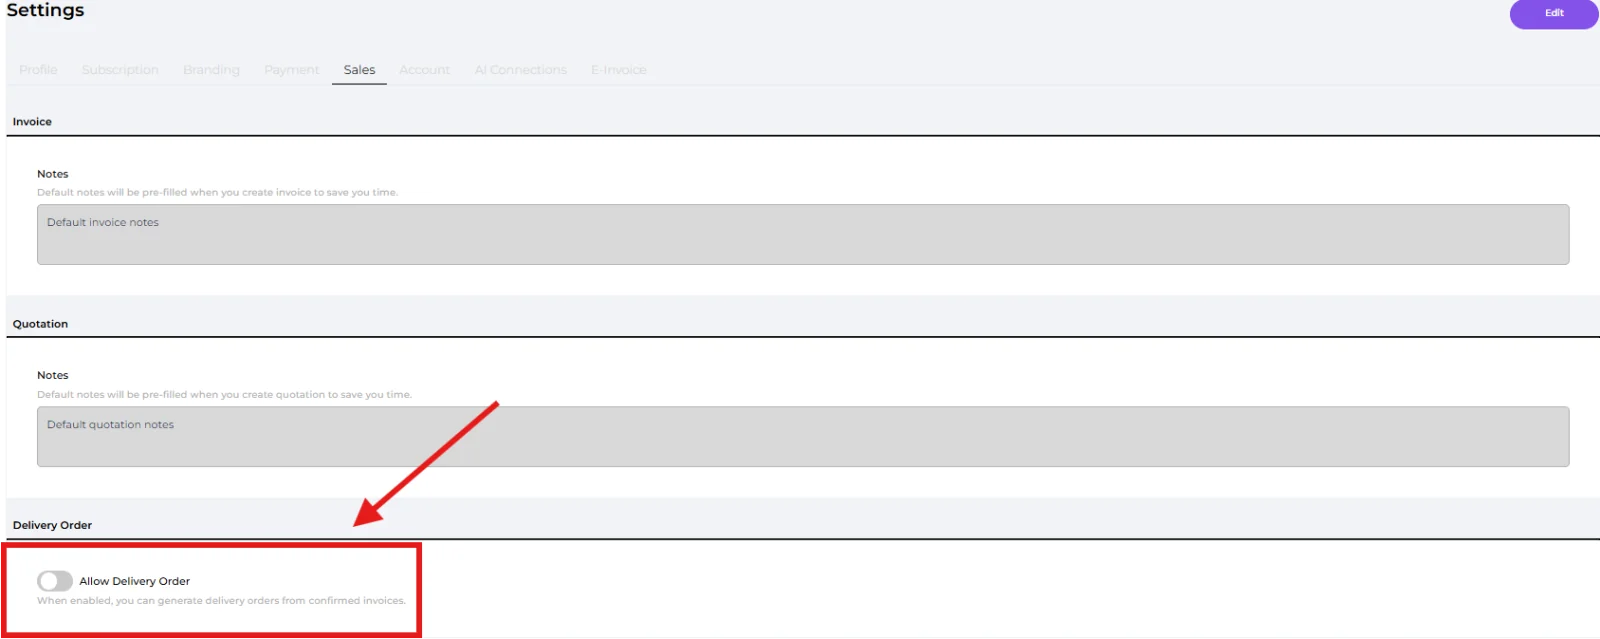
🔹 Invoice Notes
Set a default message that will appear on every invoice you generate. This saves time and ensures consistency (e.g. “Thank you for the business”).
🔹 Quotation Notes
Set a default message to include on all quotations. This message will be pre-filled each time you create a new quotation (e.g. “This quote is valid for 14 days”).
🔹 Allow Delivery Order (Optional)
Turn on to allow creating Delivery Orders from your confirmed invoices. When enabled, you'll see a "Generate DO" option on your invoices. (See the Delivery Order guide for how to use it.)
Well done! You’ve finished this guide.
You can go back to any step at any time.