

CHIP Online Payment Setup
Pigeonbook integrates with CHIP as its secure online payment gateway, enabling you to accept customer payments seamlessly.
Login with your username and password.
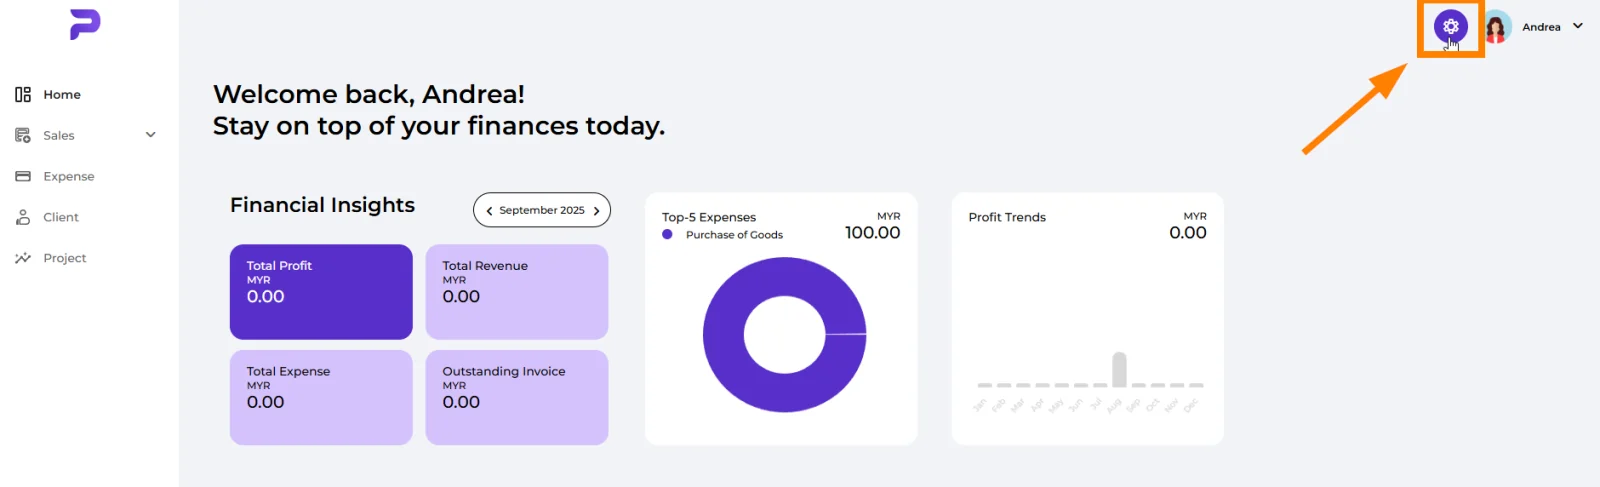
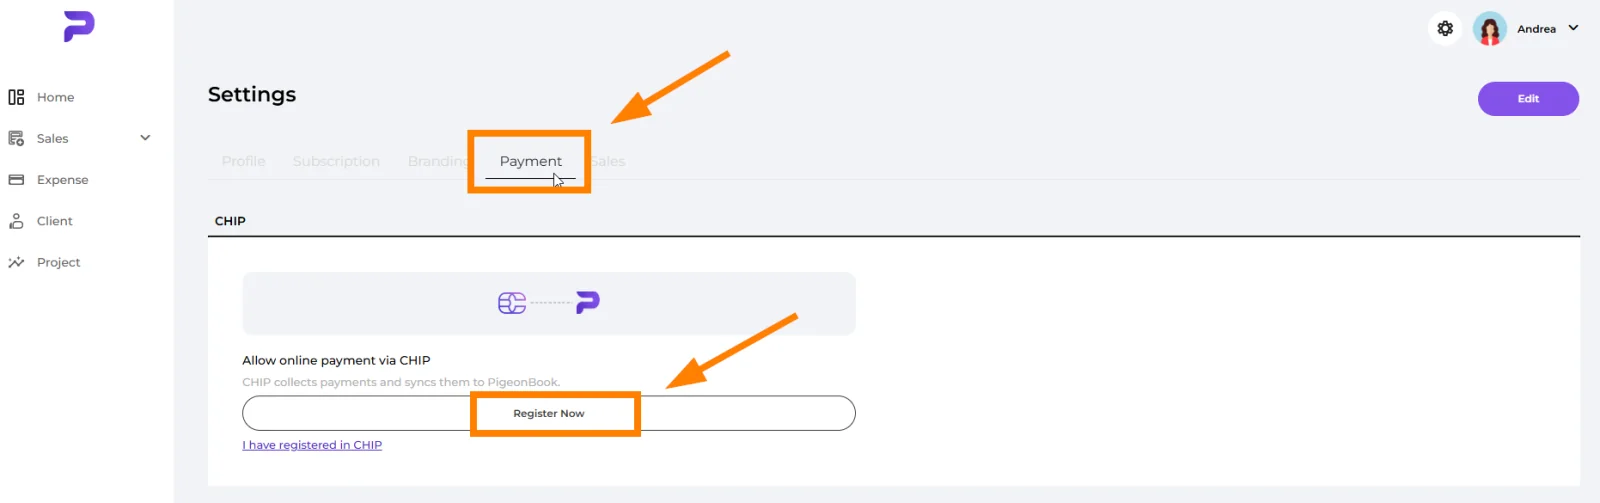
- Navigate to the Settings icon, select the Payment tab, and click Register Now to begin setup.
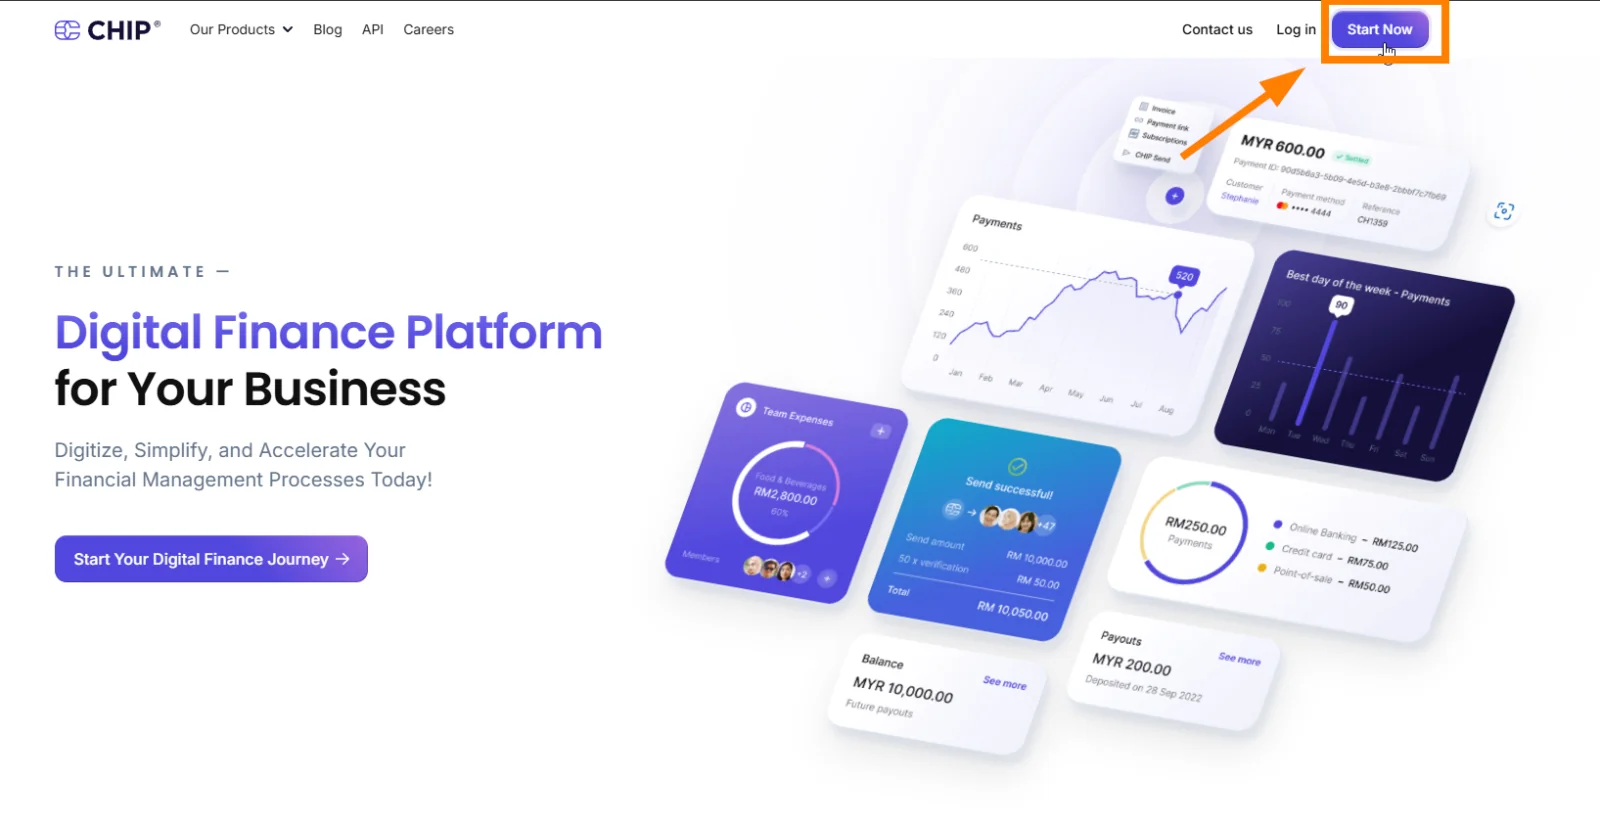
- Click Start Now.
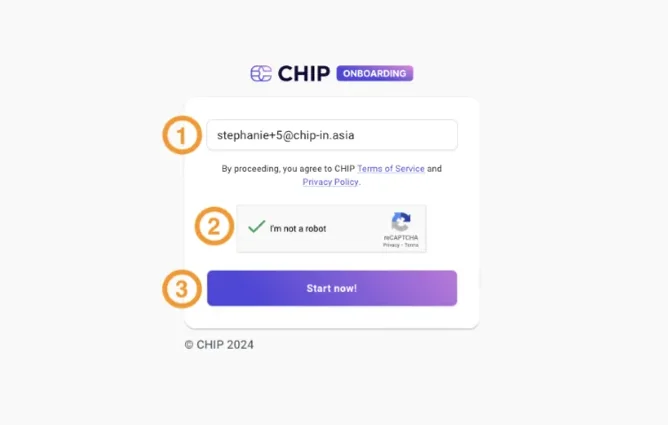
- Key in email address. Verify you are not a robot and click ‘Start Now’.
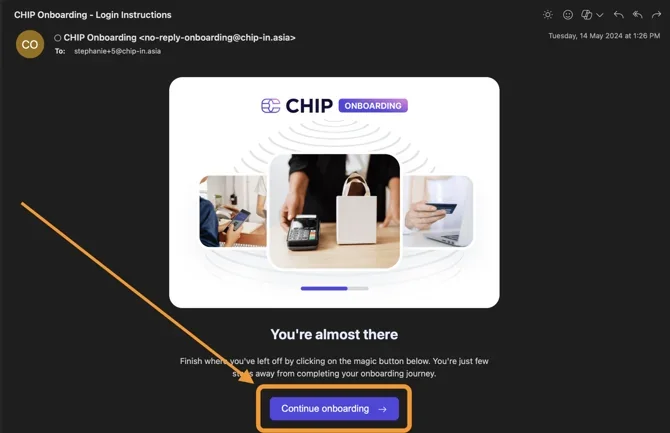
- Check your email inbox (including spam/junk folders). Click Continue Onboarding.
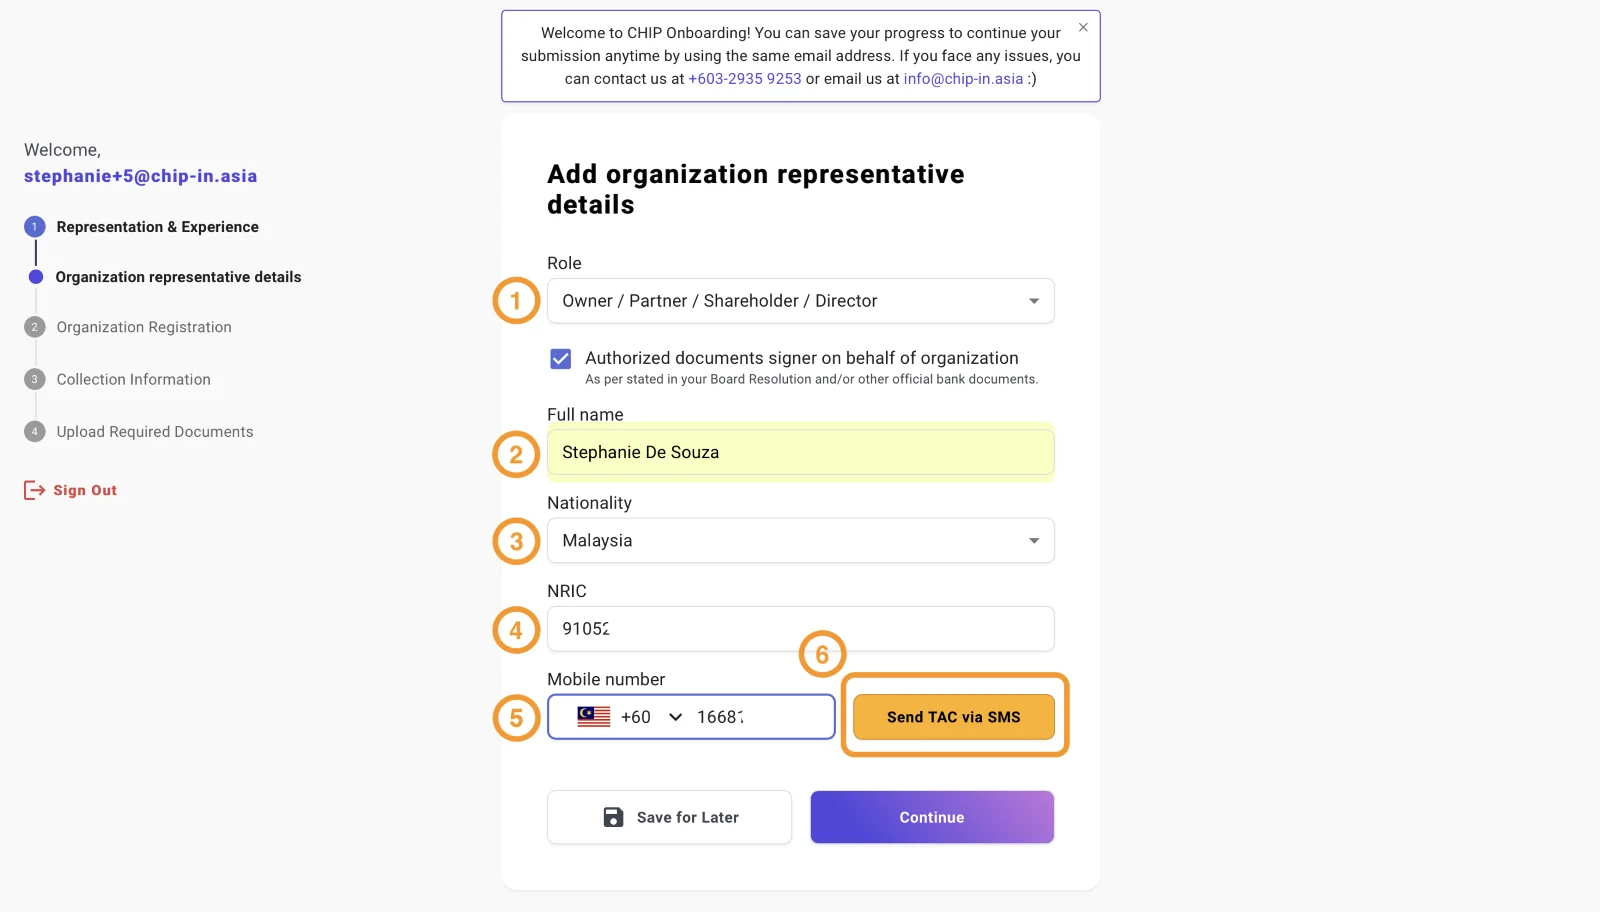
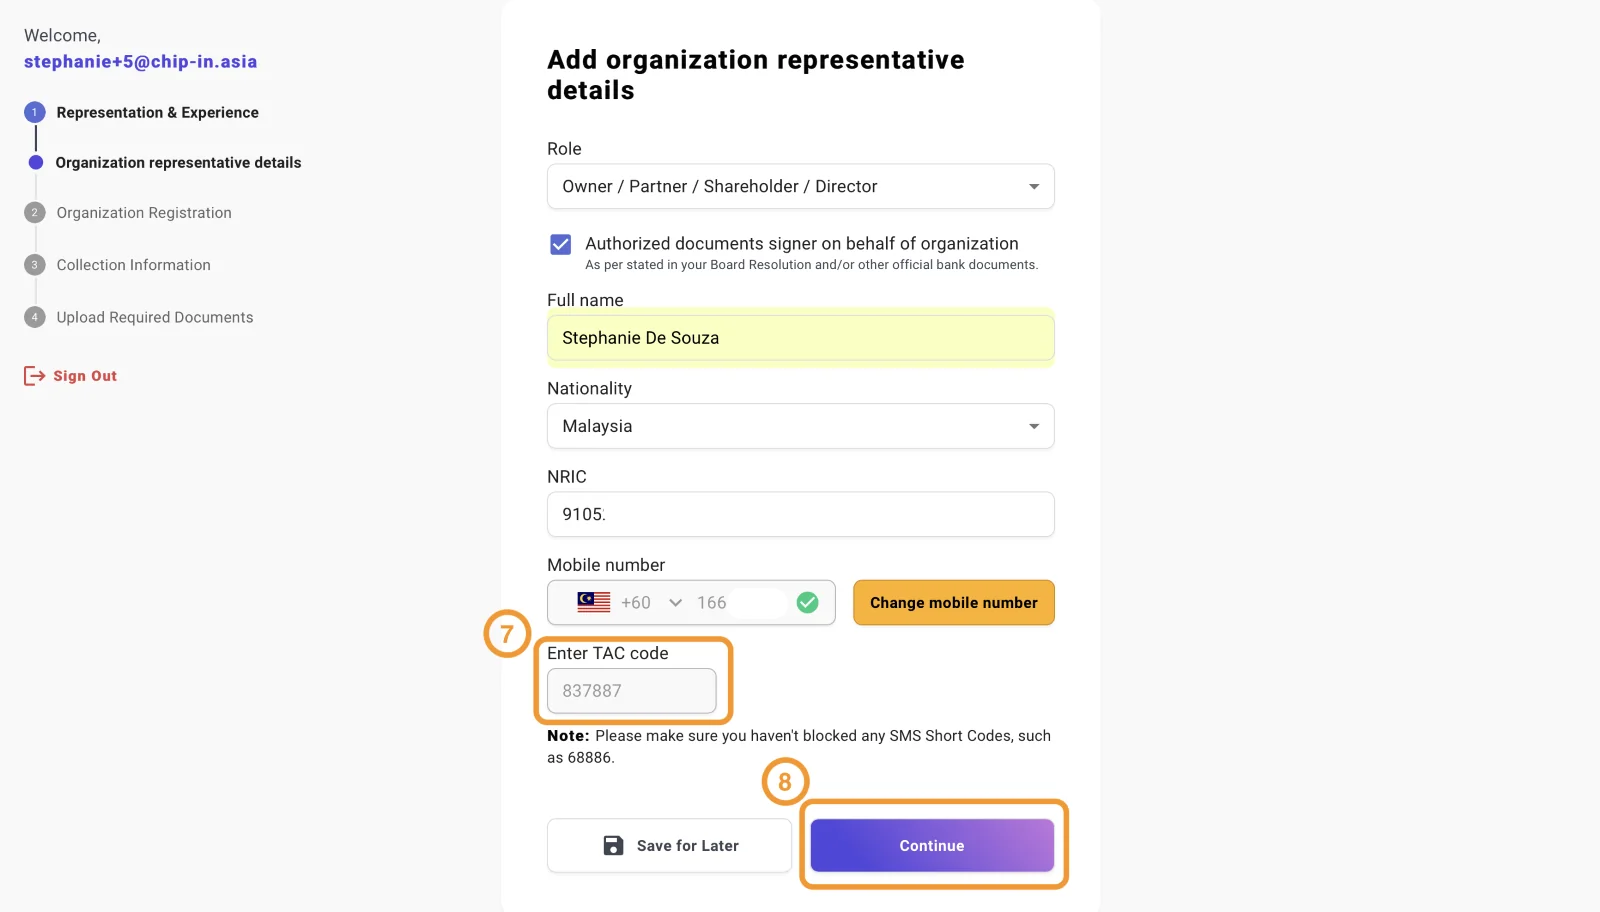
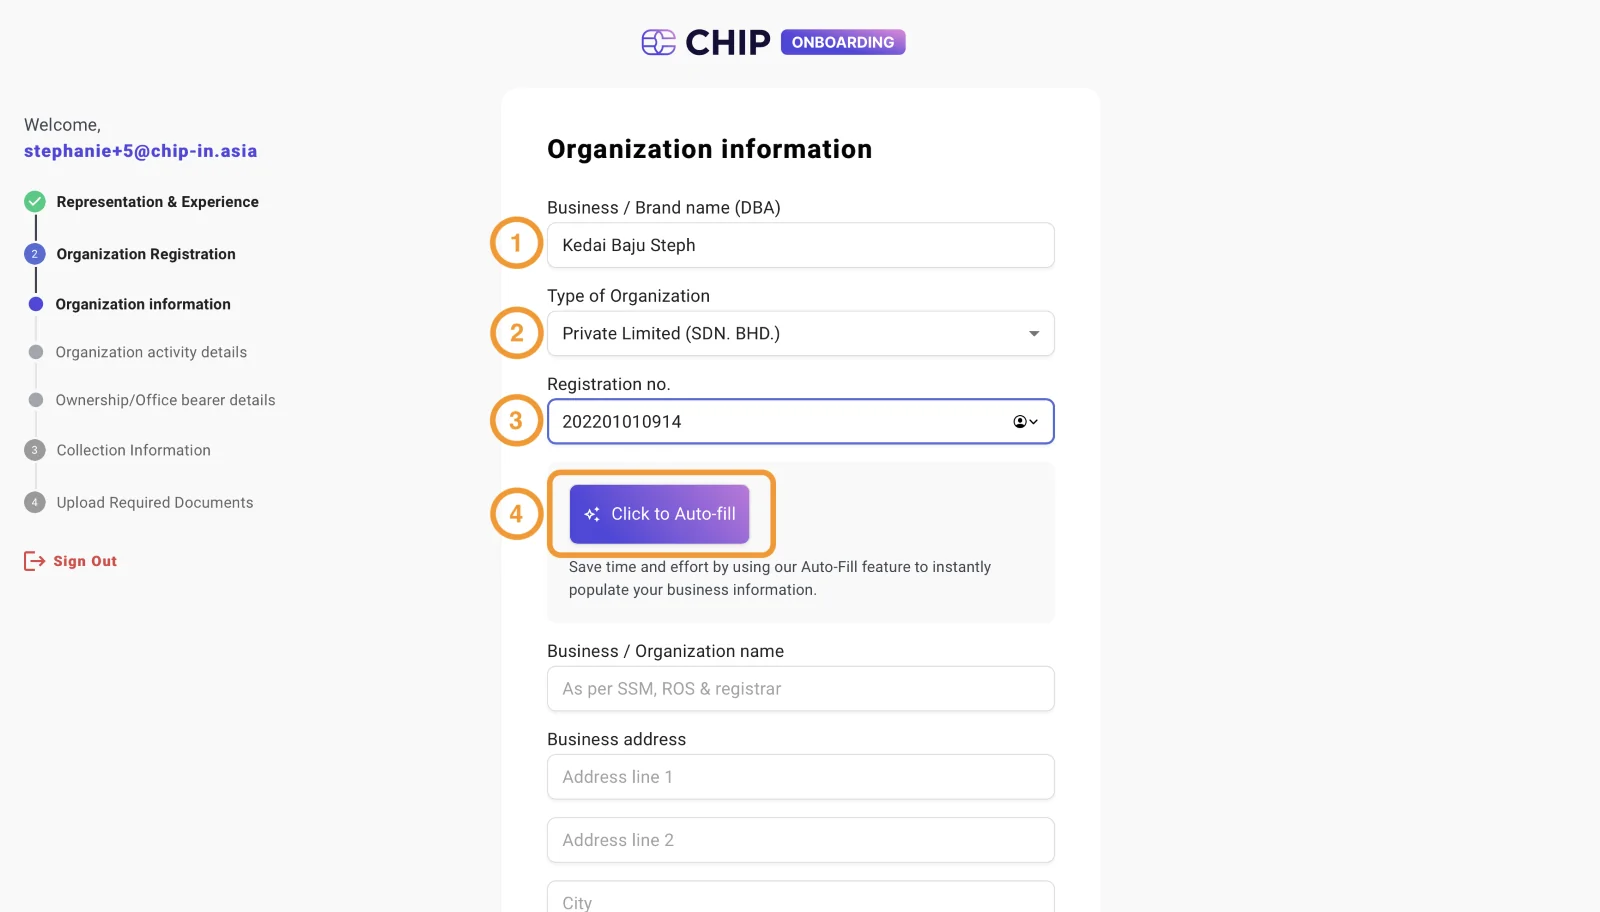
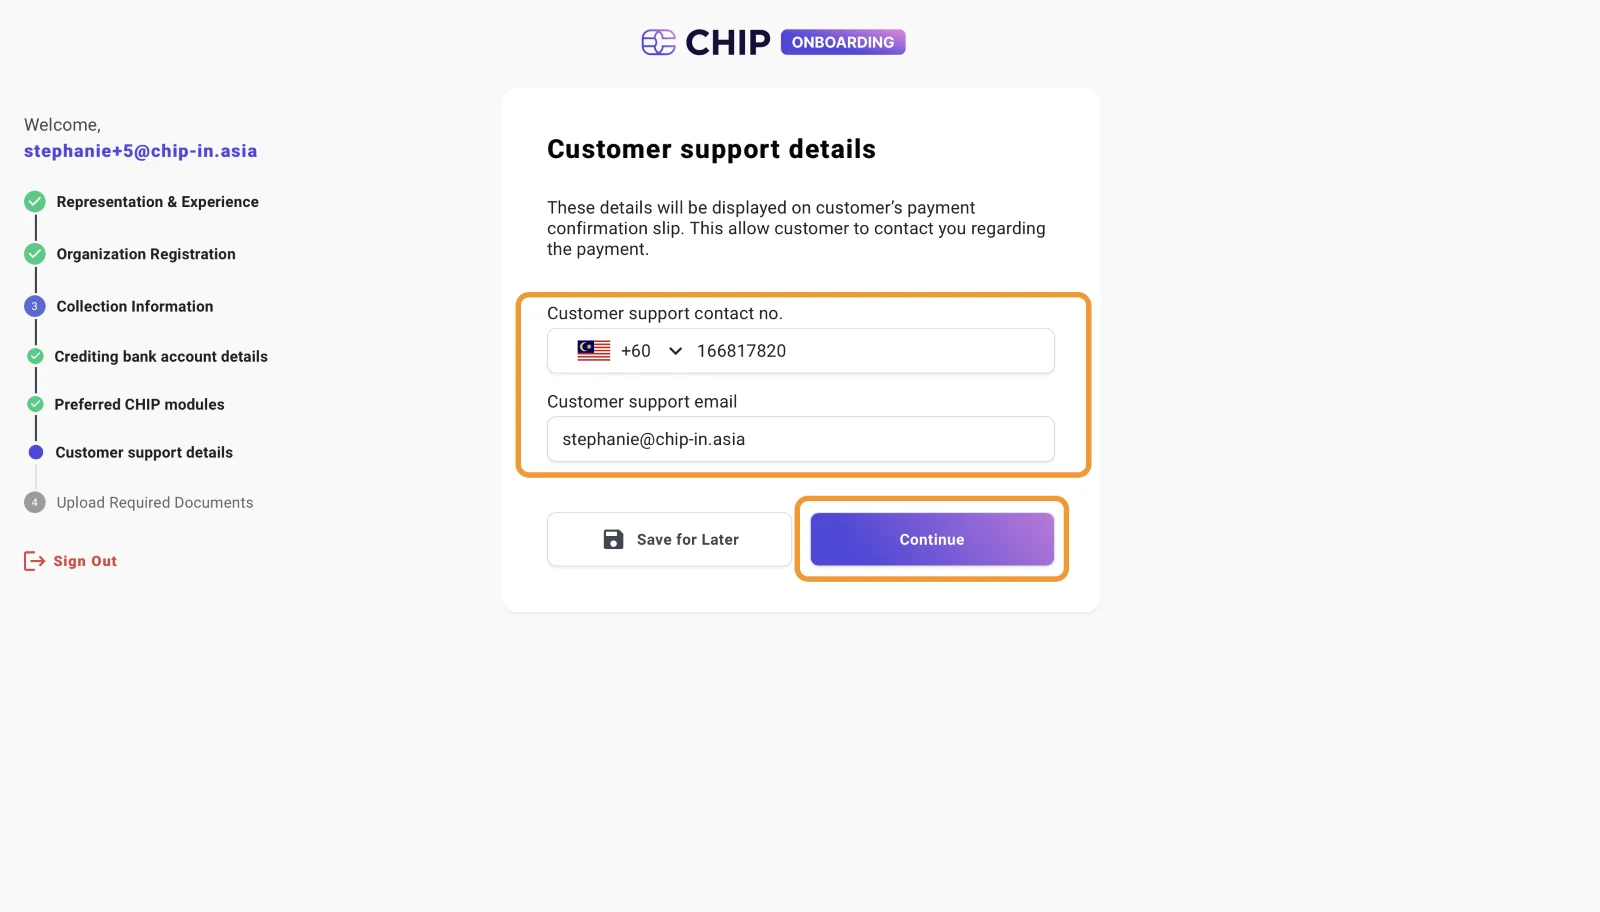
- Fill in the required details and click Continue.
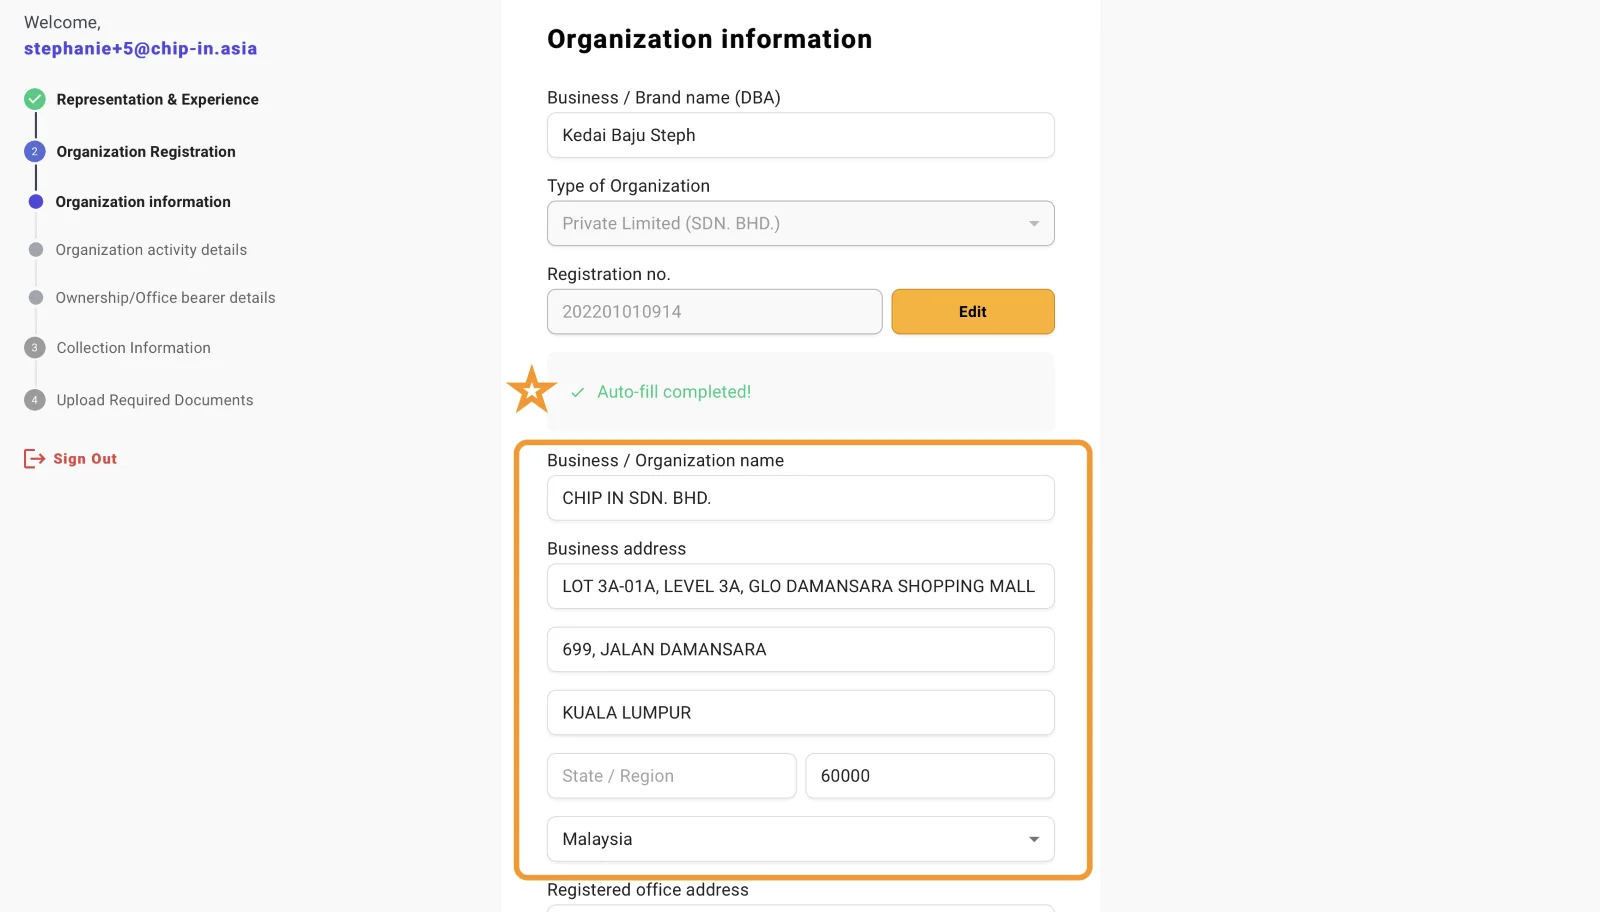
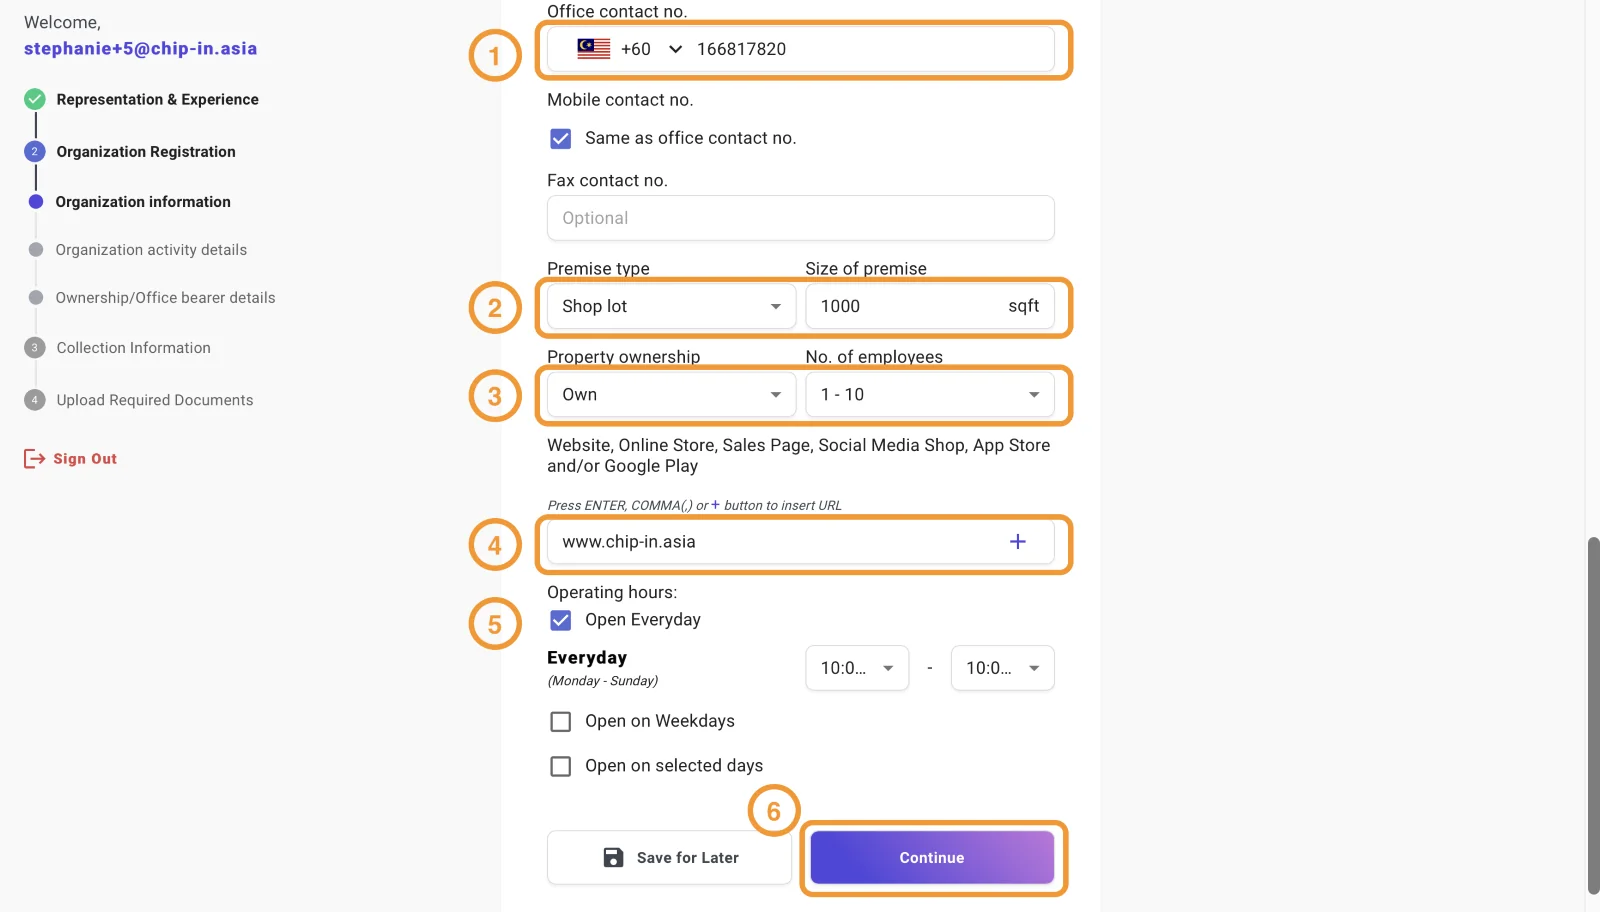
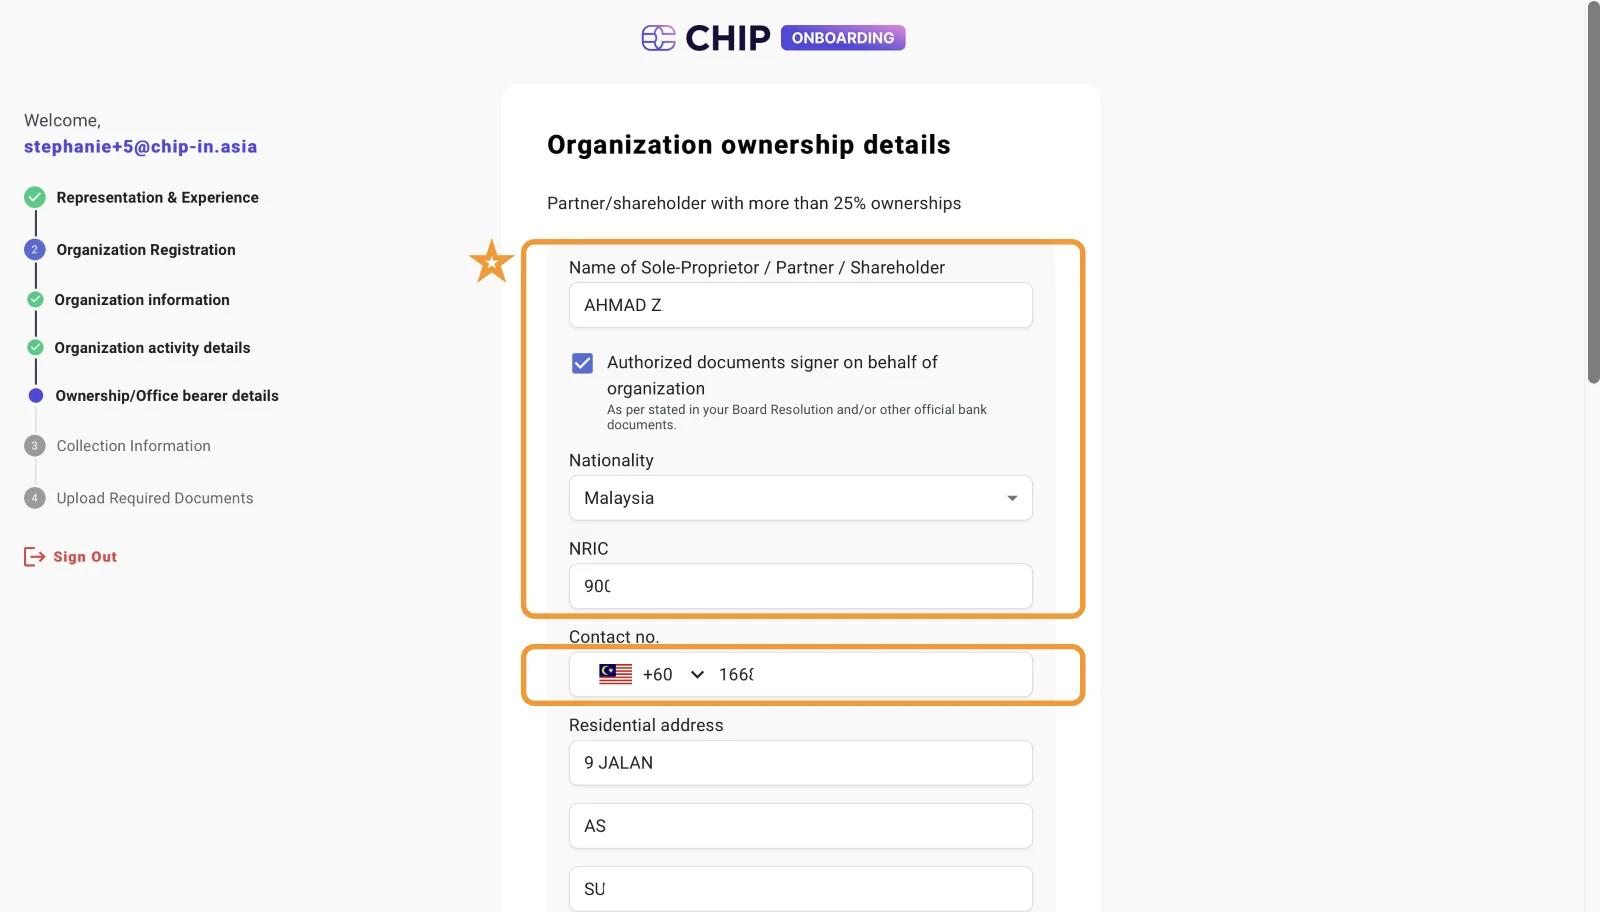
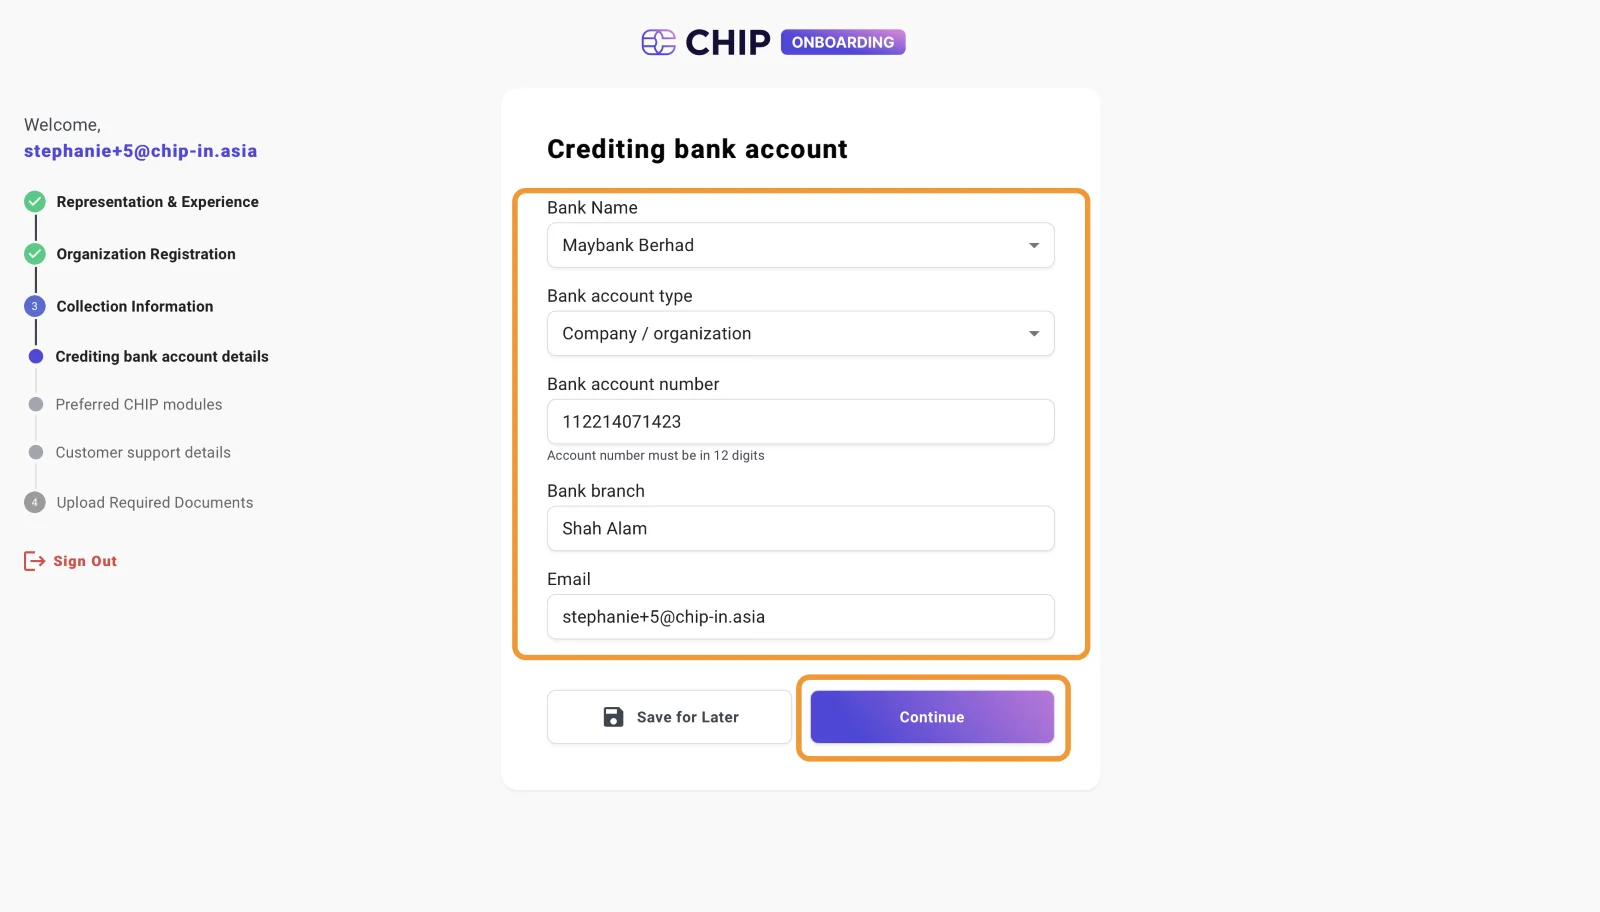
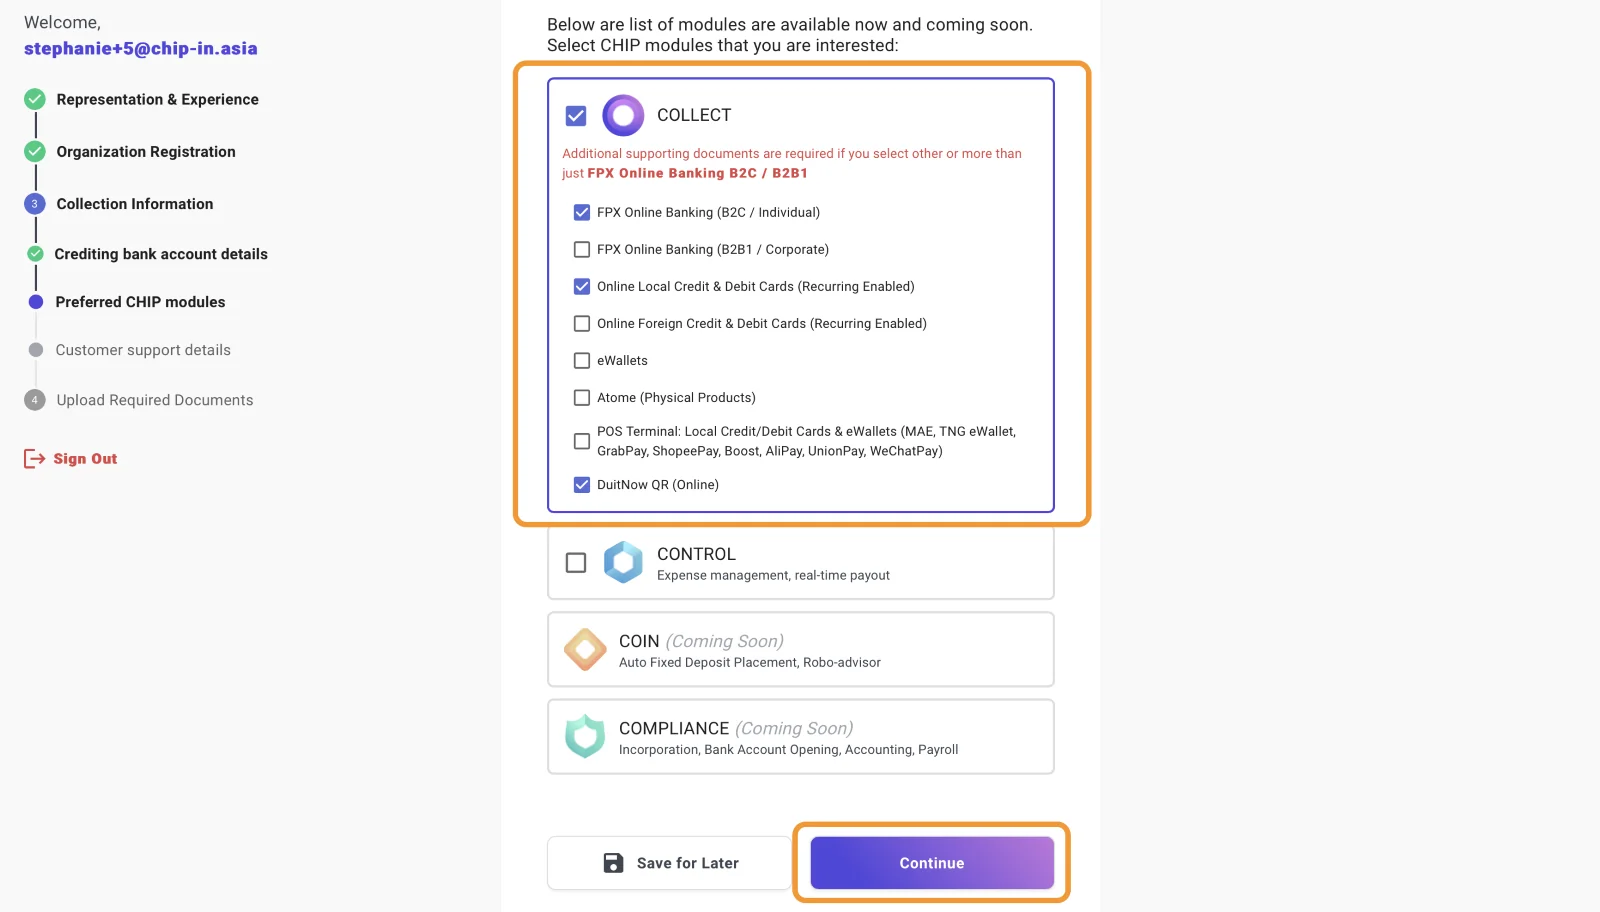
- Select your preferred modules.
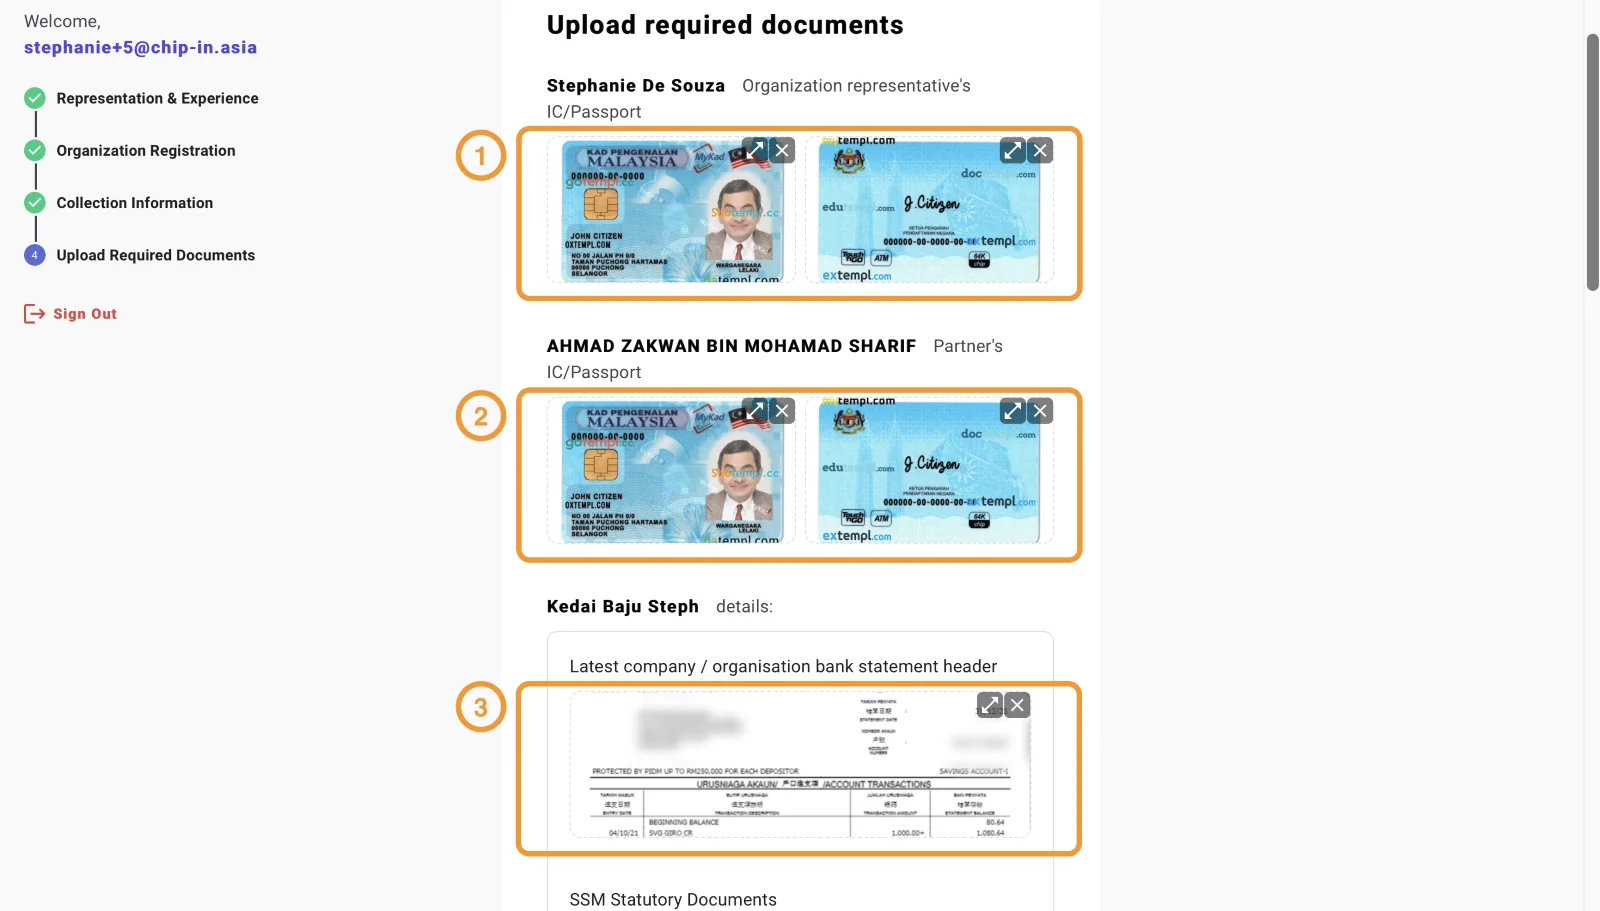
- Upload necessary documents: IC copy of owner/partners/shareholders, bank account statement header are basic requirements.
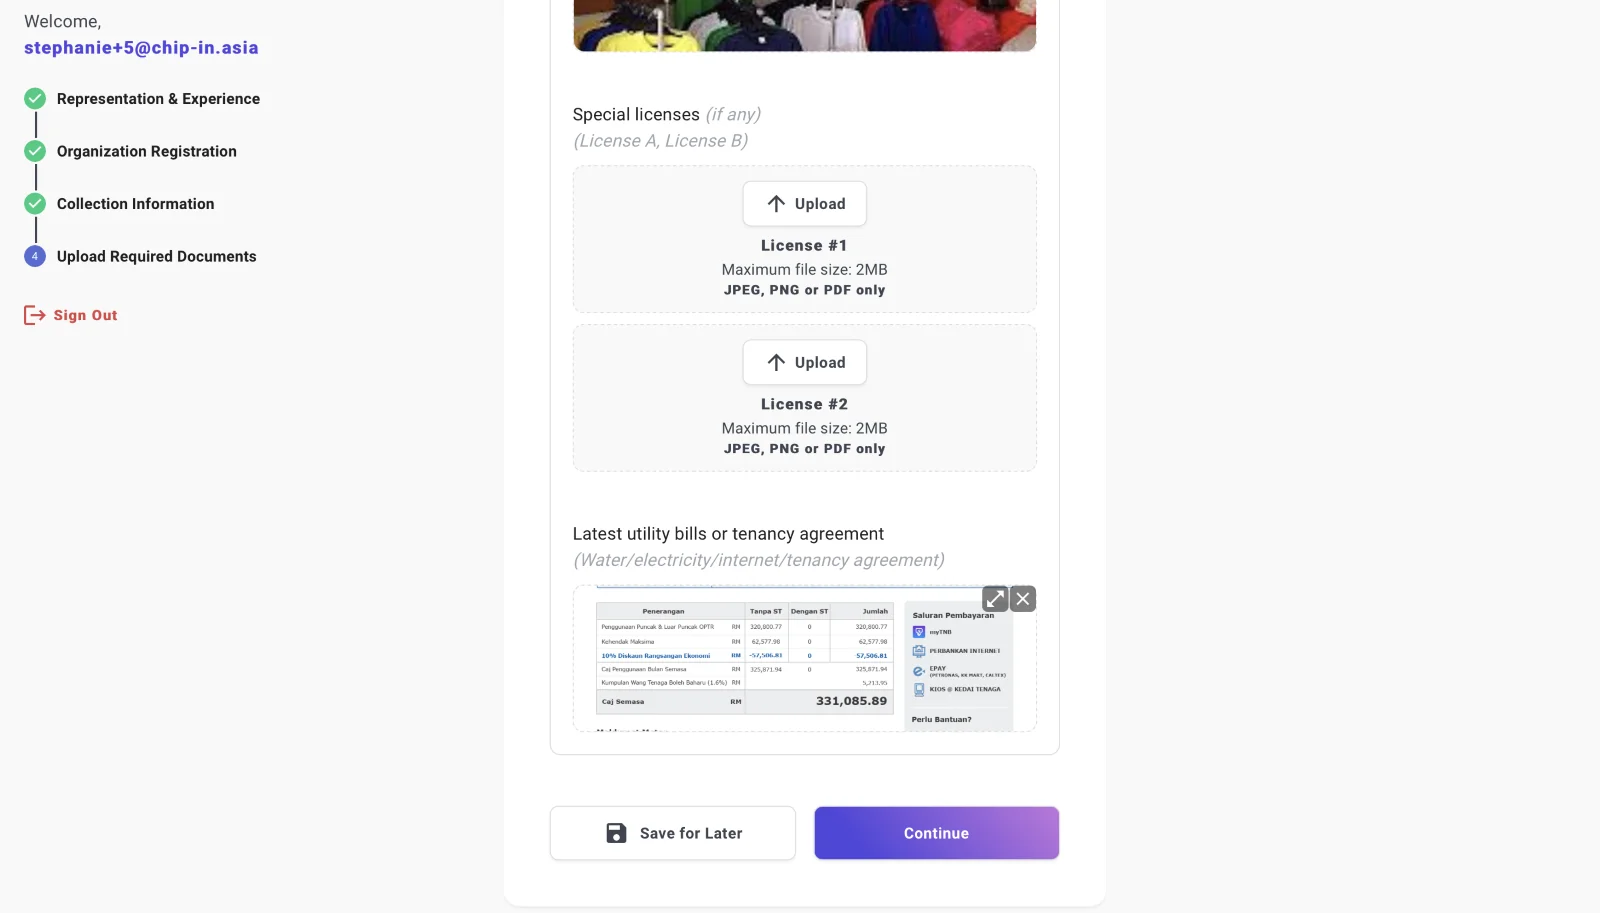
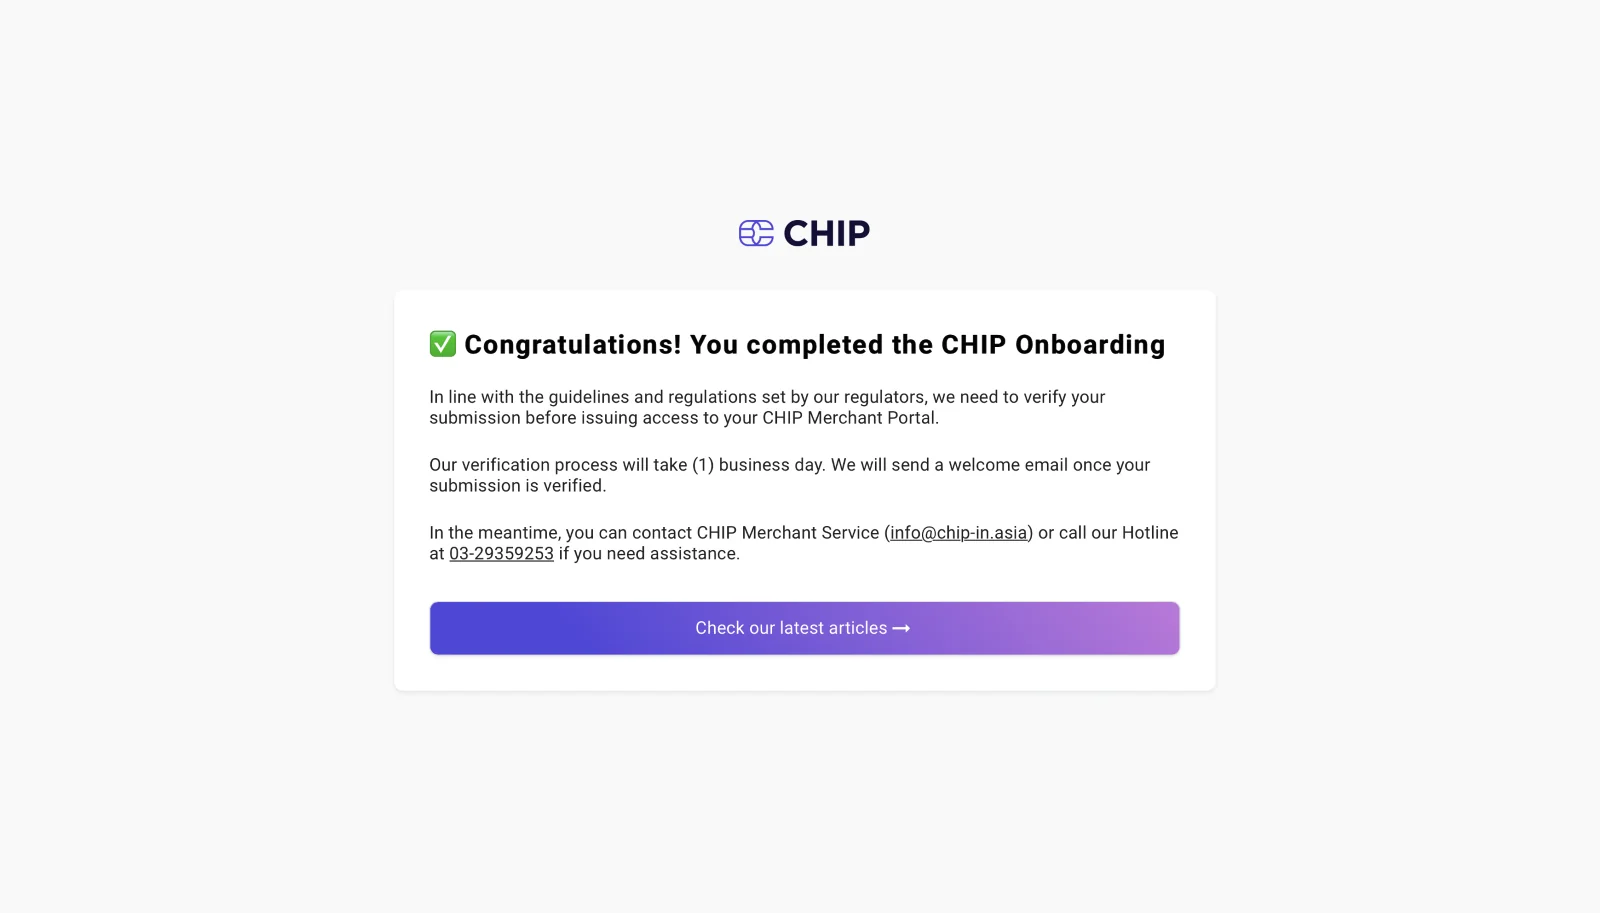
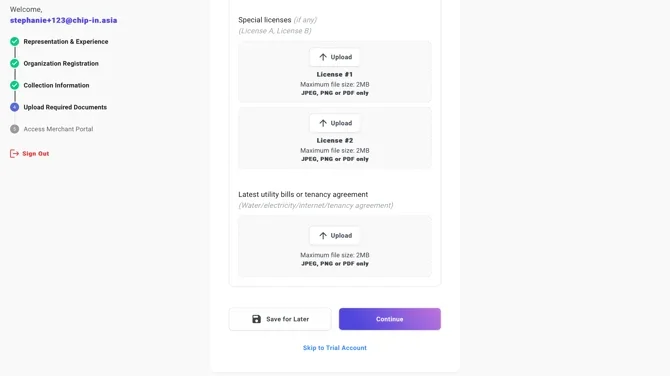
- OR Skip to Trial Account and continue your onboarding journey later.
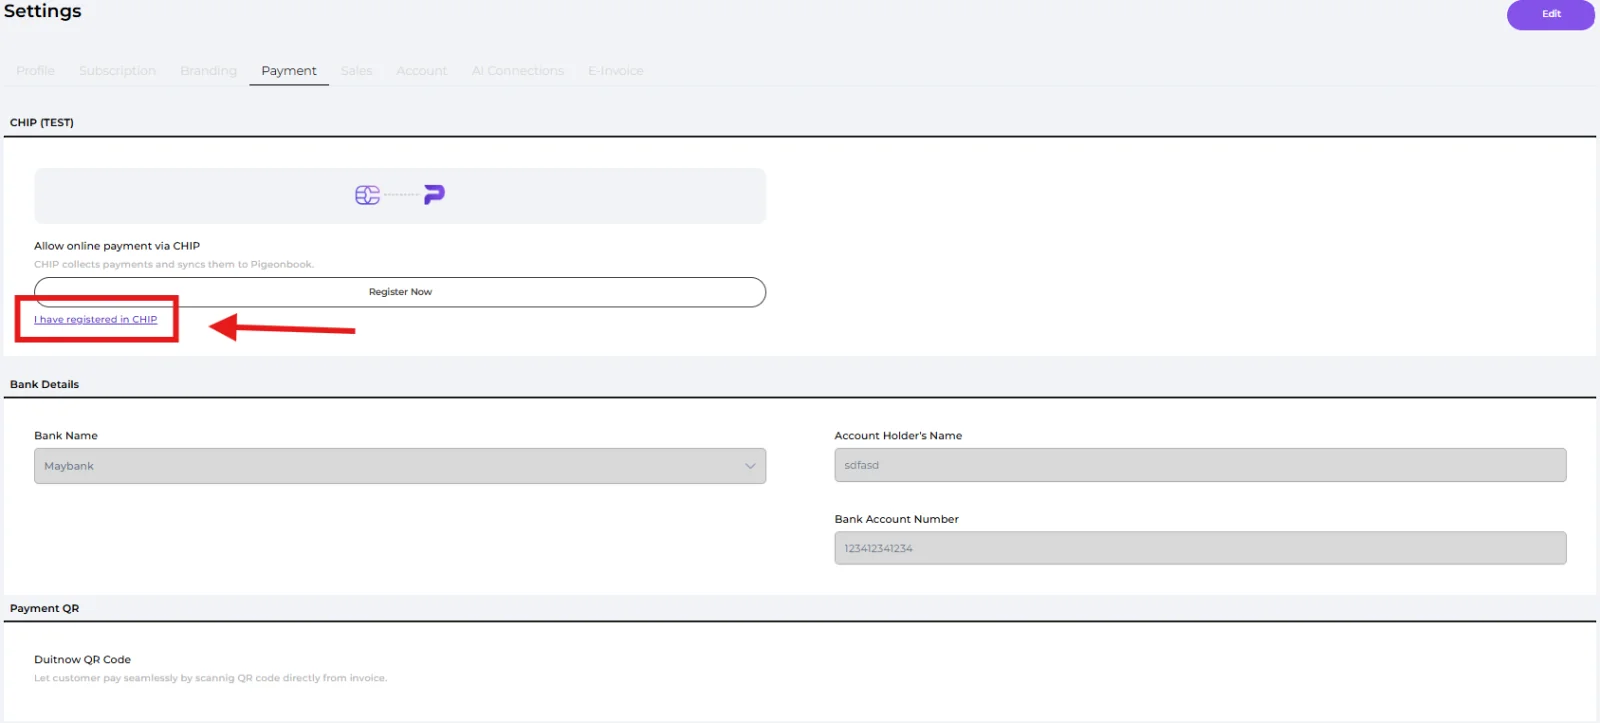
- Go back to Settings → Payment. Under the CHIP section, click "I have registered in CHIP".
- A pop-up appears asking for your Brand Id and API key.
First, get these two details from your CHIP account: Log in to your CHIP Collect account (the one you registered in Step 2).
🔹 Get your Brand ID
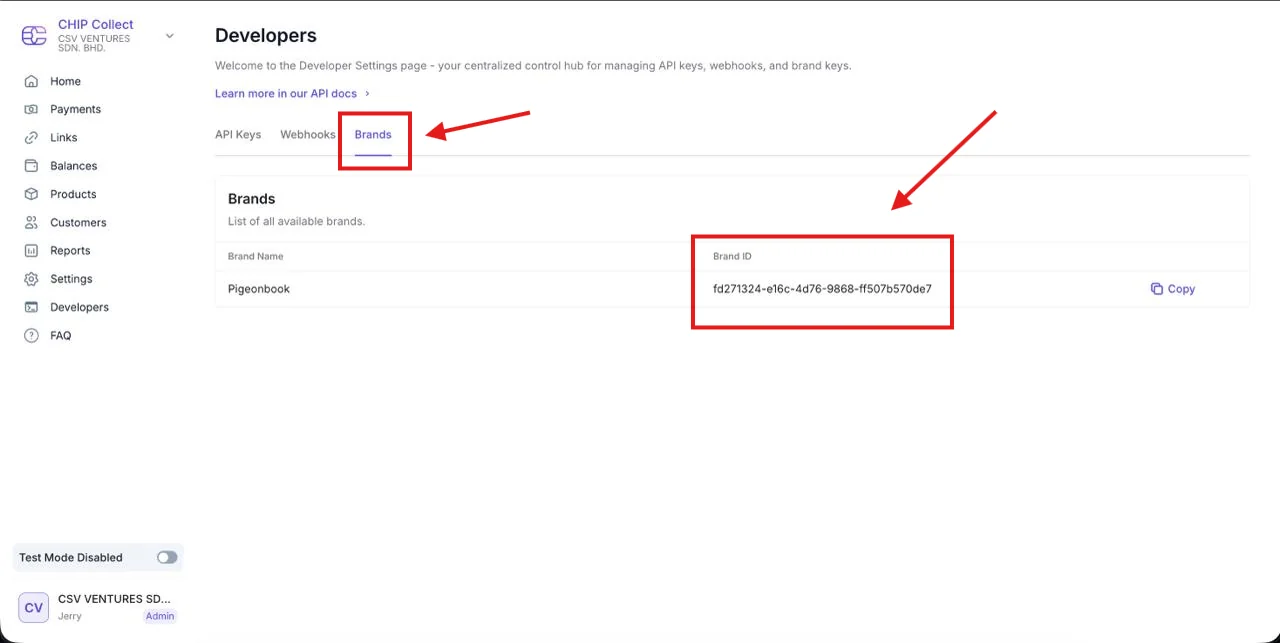
i. In CHIP Collect, open the Developers section, then the Brands tab.
ii. Your Brand ID is displayed here — copy it.
🔹 Get your API Key
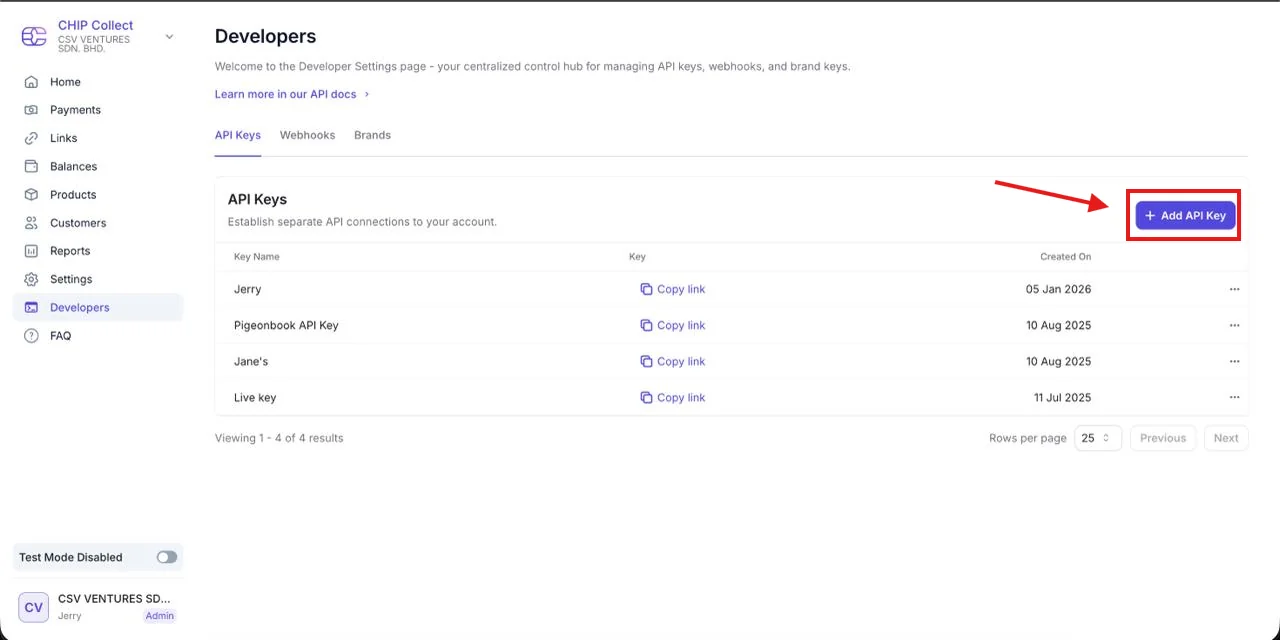
i. Still in Developers, go to the API Keys tab.
ii. Click "Create API Key".
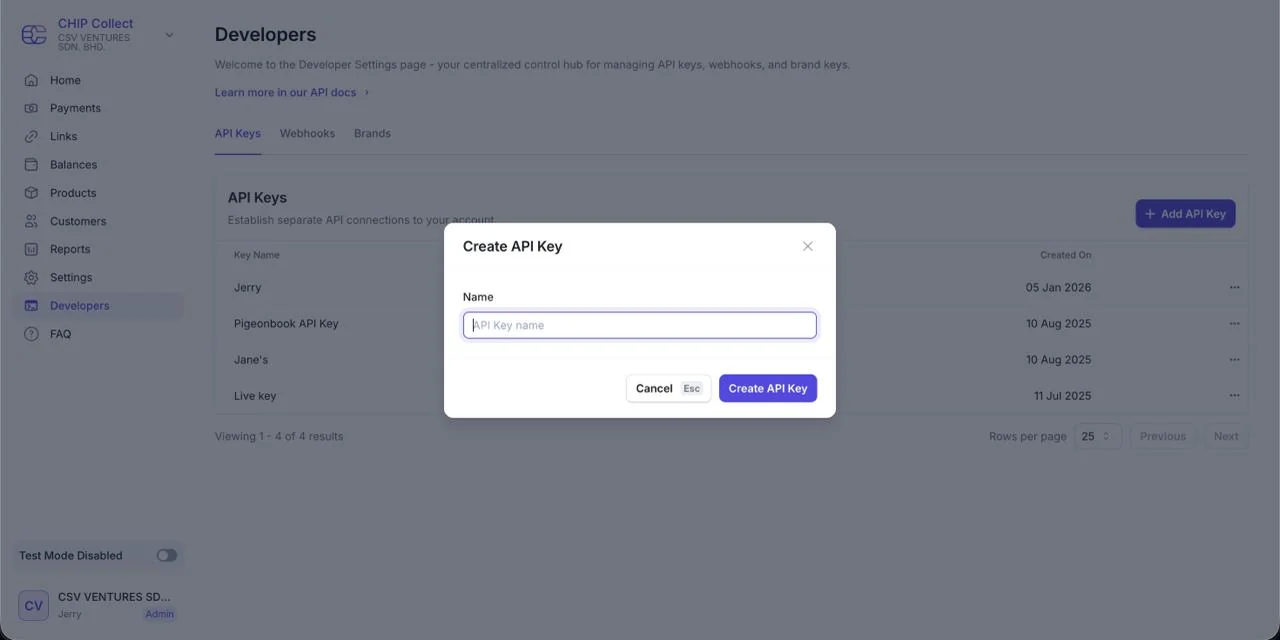
iii. Fill in the form (give the key a name, and select your brand if asked).
iv. Copy the generated API Key. ⚠️ The API Key is usually shown only once — save it somewhere safe before closing.
- Back in Pigeonbook, paste your Brand ID and API Key, then click Submit.
- Pigeonbook will verify your details — this normally takes under 5 minutes. Once the status shows Active, you're fully set up and ready to accept online payments.
💡 If you need to change these details later, click "Update Credentials" in the same section.
To send an online payment link to a customer, that customer (Contact) must have an Email Address filled in. Without it, the paymetn request can't be sent by email - so make sure your client's email is on file.
Well done! You’ve finished this guide.
You can go back to any step at any time.
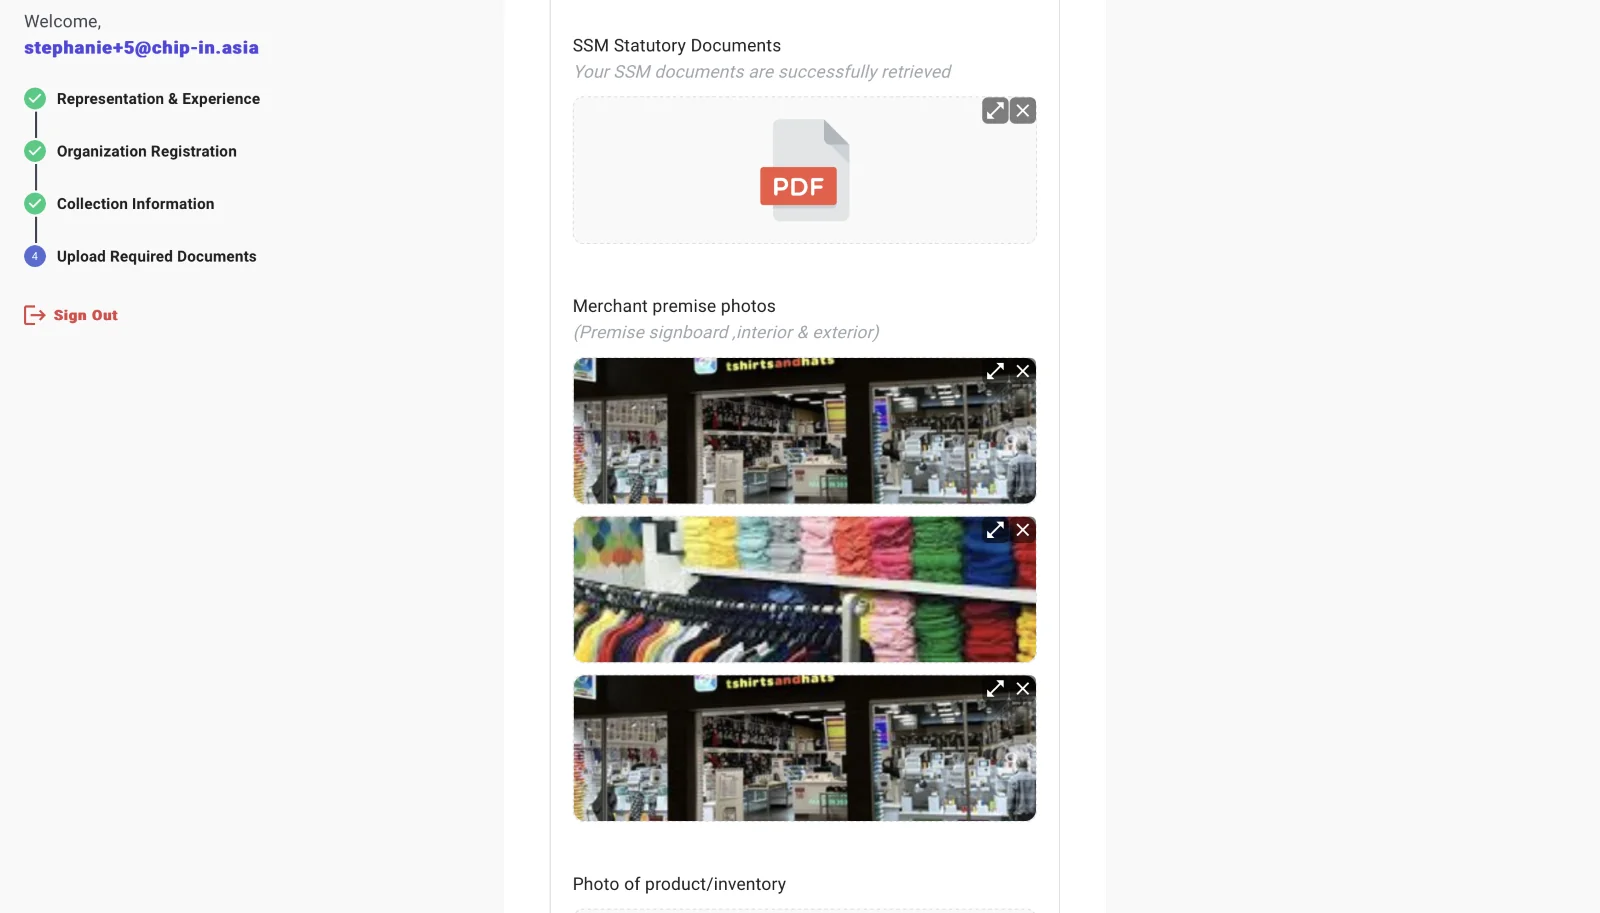
Documents needed to activate Cards and eWallets payment methods
- Merchant premise photos with signboard, interior and exterior
- Photo of product / inventory
- Special license (if applicable)
- Latest utility/telco/internet bill or tenancy agreement with name matching company's name or owner's name
- Website must display Refund, Privacy, Shipping/Return Policies
- Website must display SSM registration number, business address and contact details
For home-based businesses, please submit premise photos (i) Front door with unit number, (ii) Working space at home, (iii) Exterior photos of the house
Tips:
- Save your progress and come back anytime.
- Click to Auto-fill is a shortcut button to auto-populate SSM registration details.
- For website URL, key in your business social media URL if you do not own a website.
- For quickest onboarding and activation, select FPX and DuitNow QR.
- Customer support details would appear on the payment page.