

Manual Entry for Expenses
Manually enter your expense details, including category, amount, and payment method, to keep accurate financial records.
Navigate to "Expense" tab and select "Add new" button

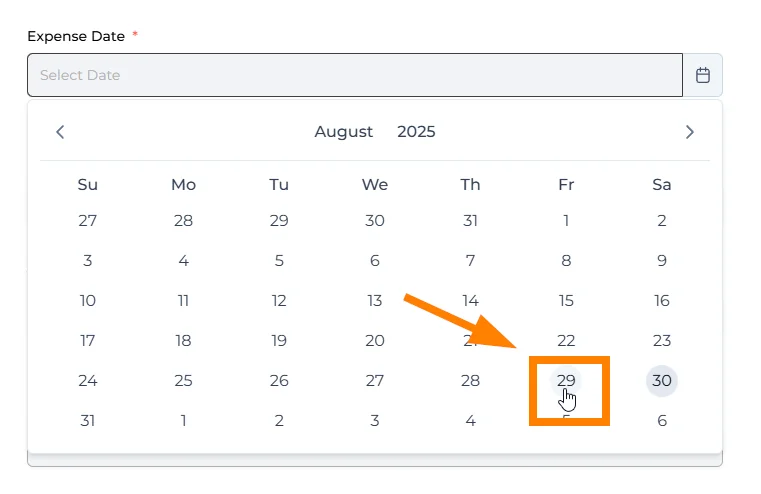
Select the date on which the expense was incurred.
🔹 Category (Required)
Choose the category that best describes the type of expense (e.g., Purchase of Goods, Salaries & Wages etc.). For more info, please refer to the Types of Expense Category section.
🔹 Total Amount (Required)
Enter the total amount of the expense.
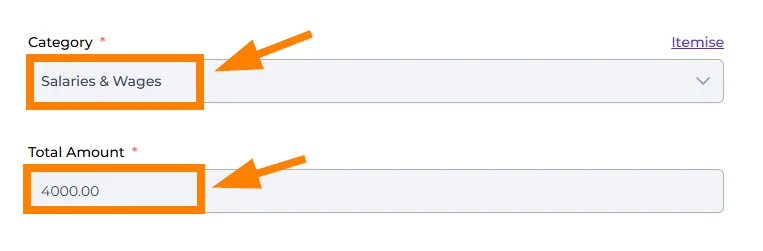
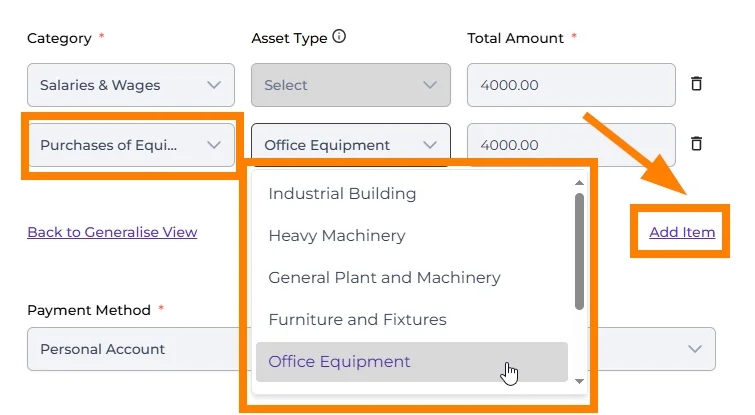
If you have multiple categories to assign to this expense, you can click "Itemize" to break down the expense into specific categories.

You can click "Add Item" to add multiple categories and enter the corresponding amounts for each. The Asset Type dropdown will appear only when the category "Purchases of Equipment > RM2000" is selected, allowing you to specify the type of asset purchased.
🔹 Payment Method (Required)
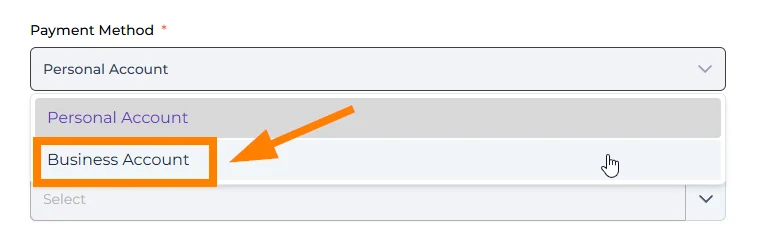
Select the payment method used for this expense (e.g., Personal Account, Business Account).
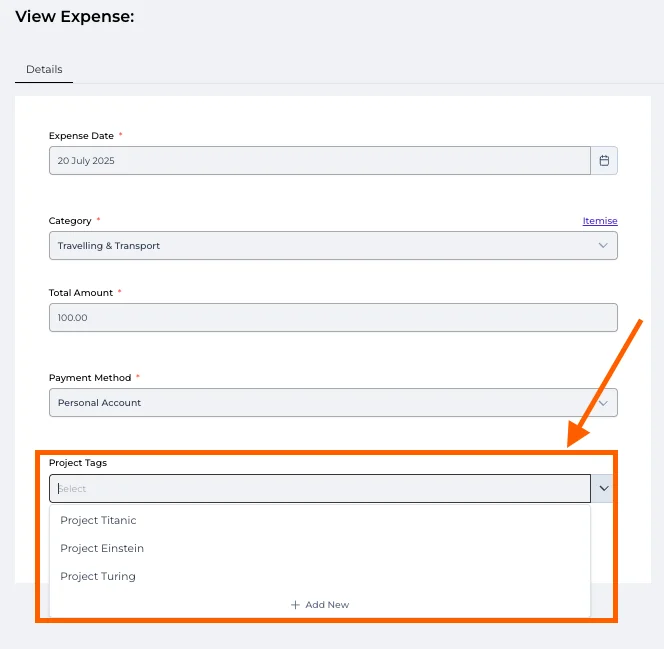
🔹 Project Tag (Optional)
Choose an existing tag or click "Add New" to create a new project tag.
🔹 Remarks (Optional)
Enter any additional notes or comments regarding this expense.

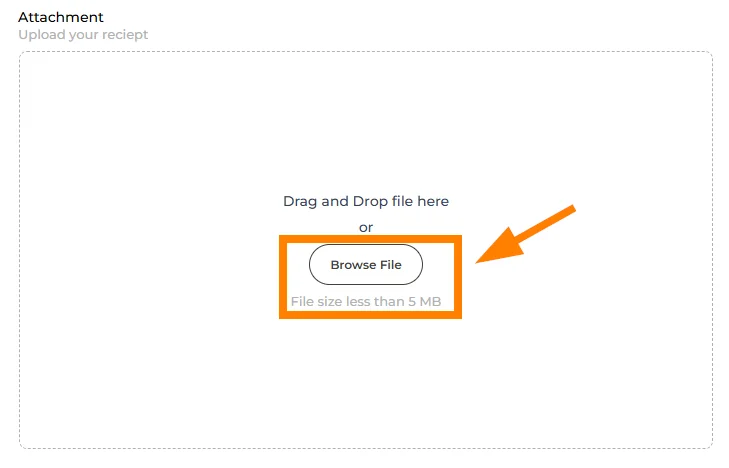
🔹 Attachment
Upload one receipt at a time by clicking "Browse File" or drag and drop the file into the designated area.
Ensure the file is in an acceptable format (e.g., PDF, JPEG, PNG) and within the size limit.
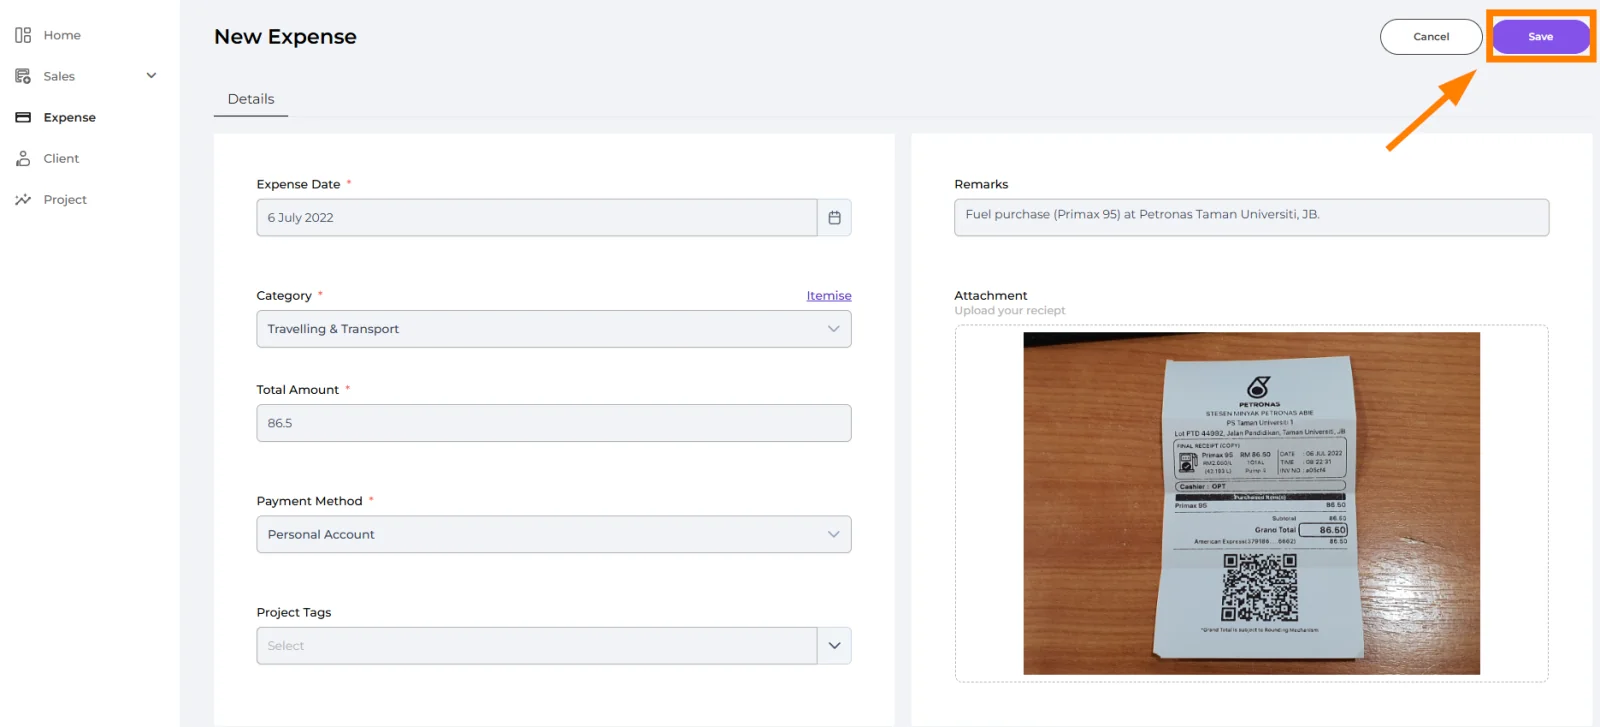
Click the "Save" button to expense details.
Well done! You’ve finished this guide.
You can go back to any step at any time.